Microsoft Entra
Connect Microsoft Entra so your team can sign in to Davner with their work accounts.
Connect Microsoft Entra so your team can sign in to Davner with their work accounts. Your IT administrator will create an application in Entra, choose who has access, and connect it to Davner.
Before you start
- Sign in to Davner as an admin or owner, open Organization → Settings, and select Set up SSO.
- Work with your IT administrator to create the Entra application and choose who should have access.
- Keep Davner’s SSO settings open while you work in Entra.
In Davner, enter your team’s email domain in the connection’s Domain field. Separate multiple domains with commas if they use the same Entra tenant. Do this before copying the Reply URL (ACS URL) into Entra.
Configure Microsoft Entra
Open Enterprise applications
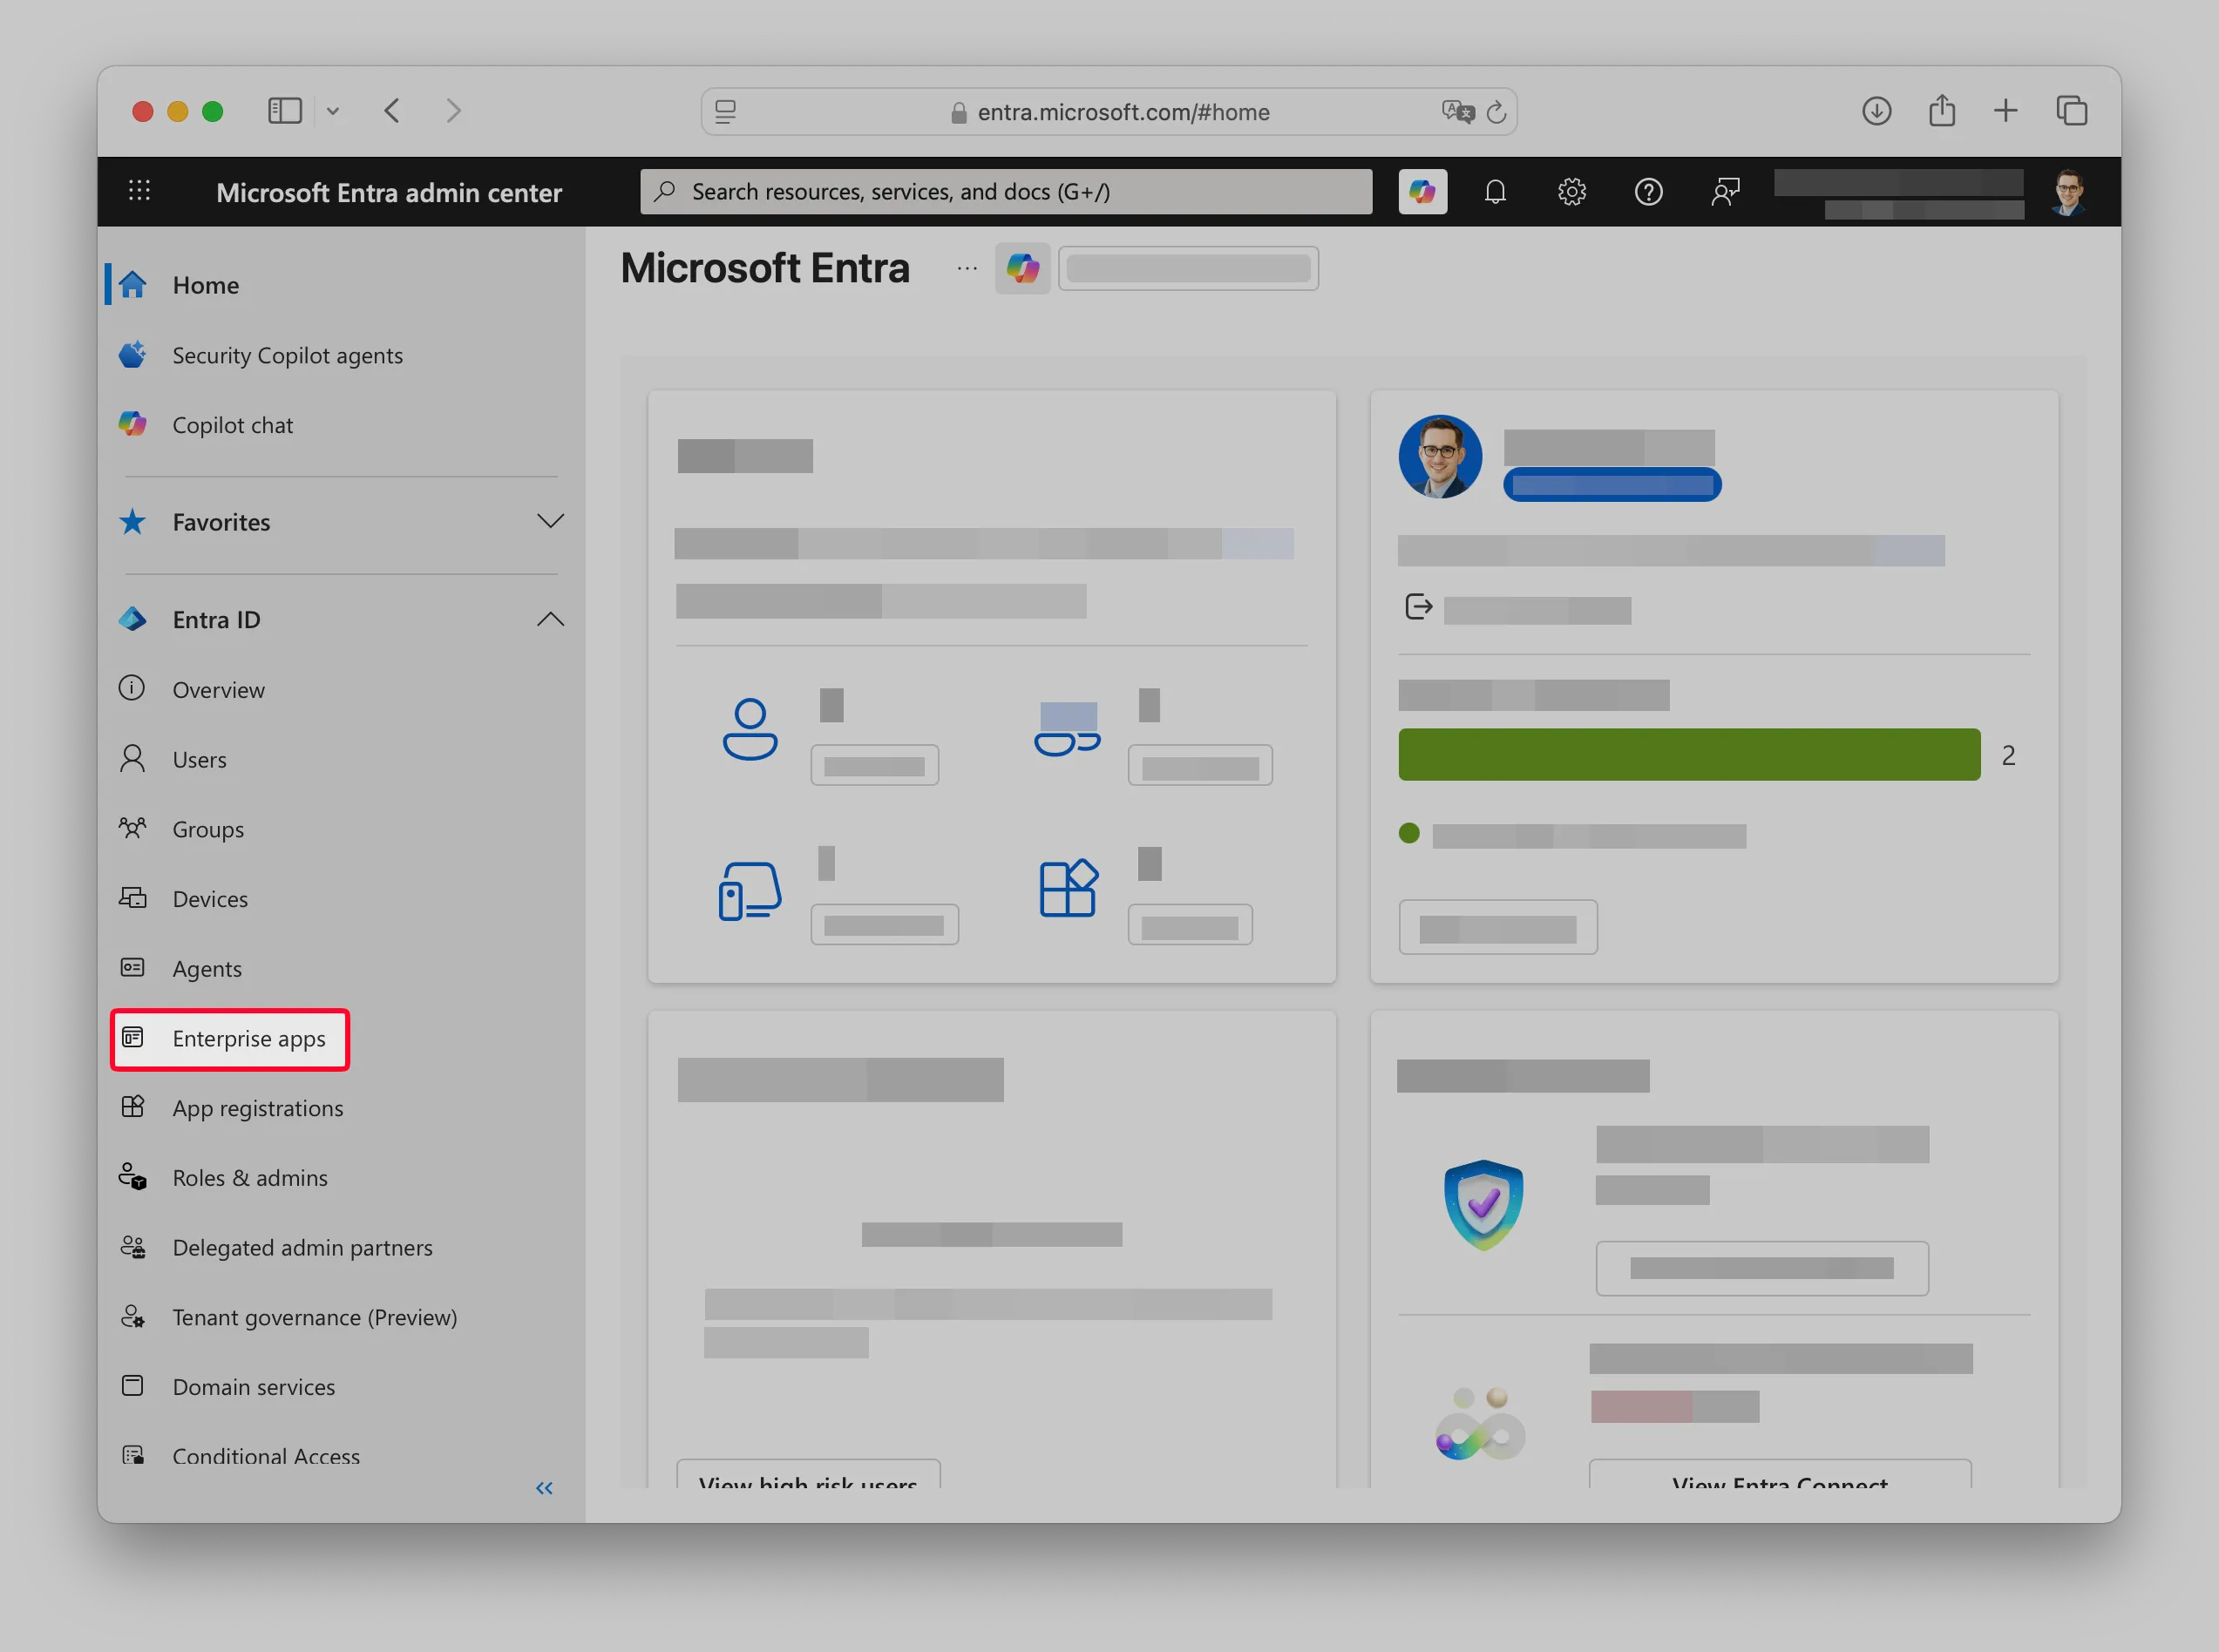
Open the Microsoft Entra admin center and select Enterprise apps under Entra ID.
Create a new application
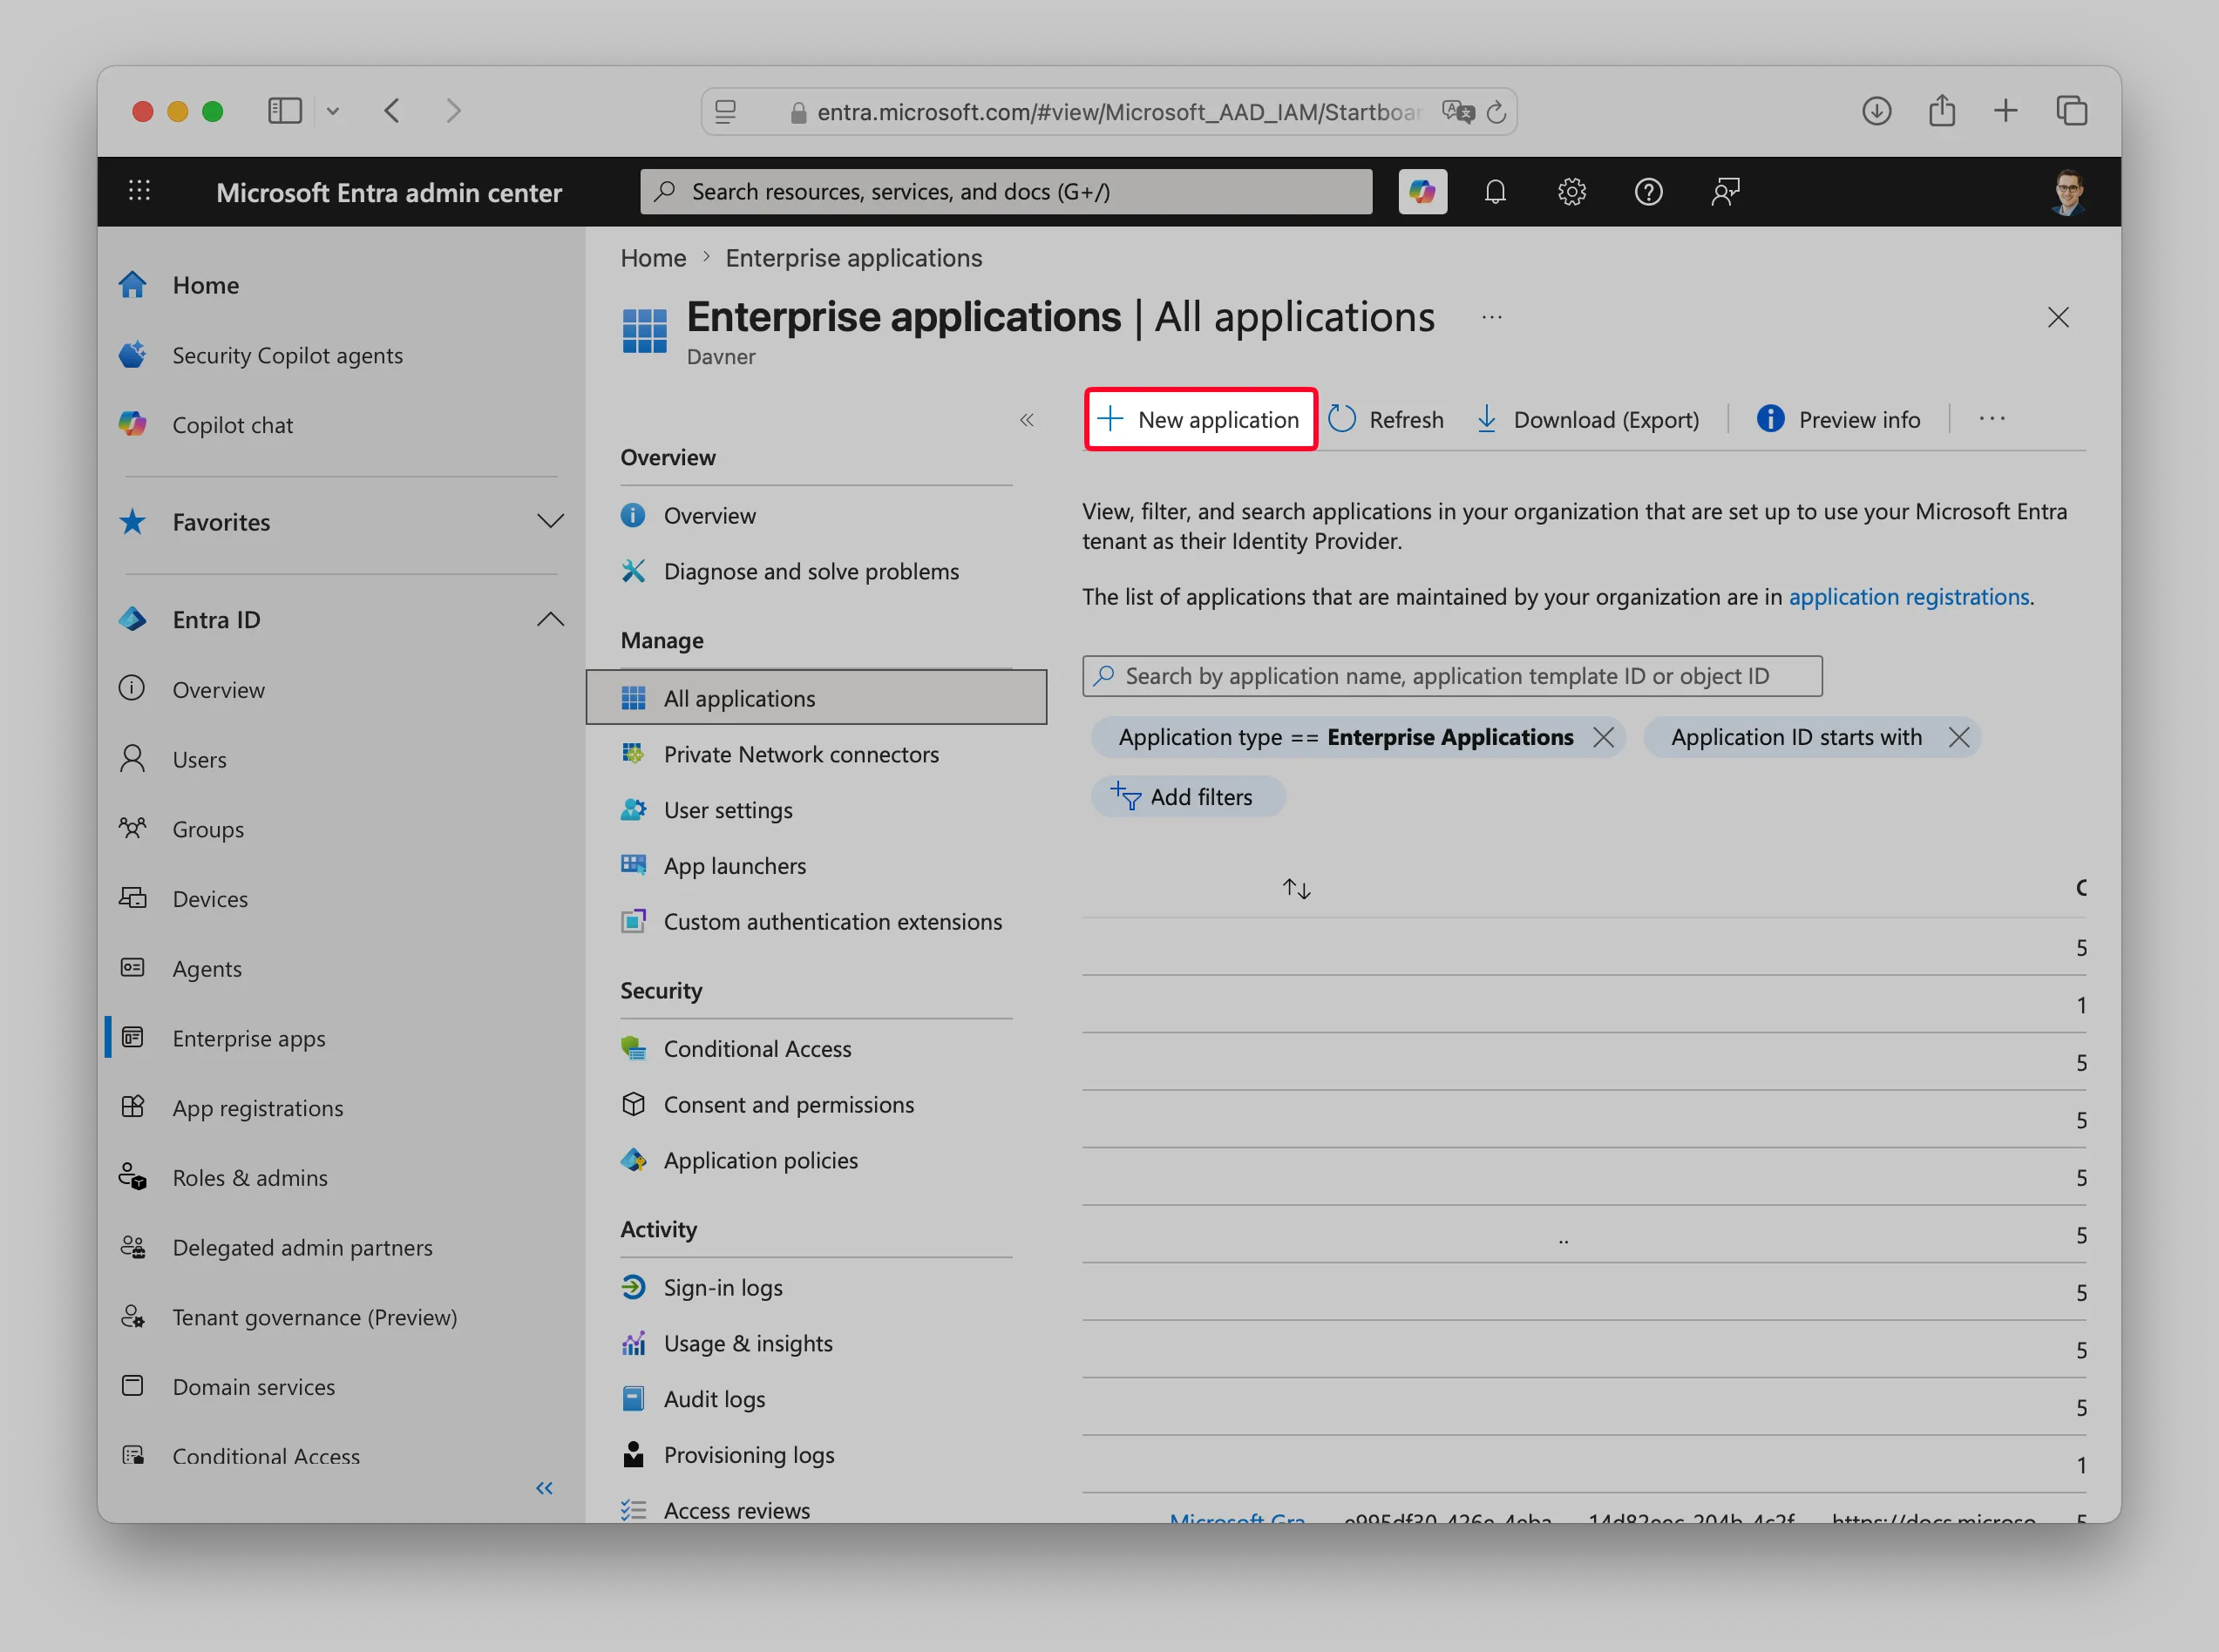
On the Enterprise applications page, select New application.
Create your own application
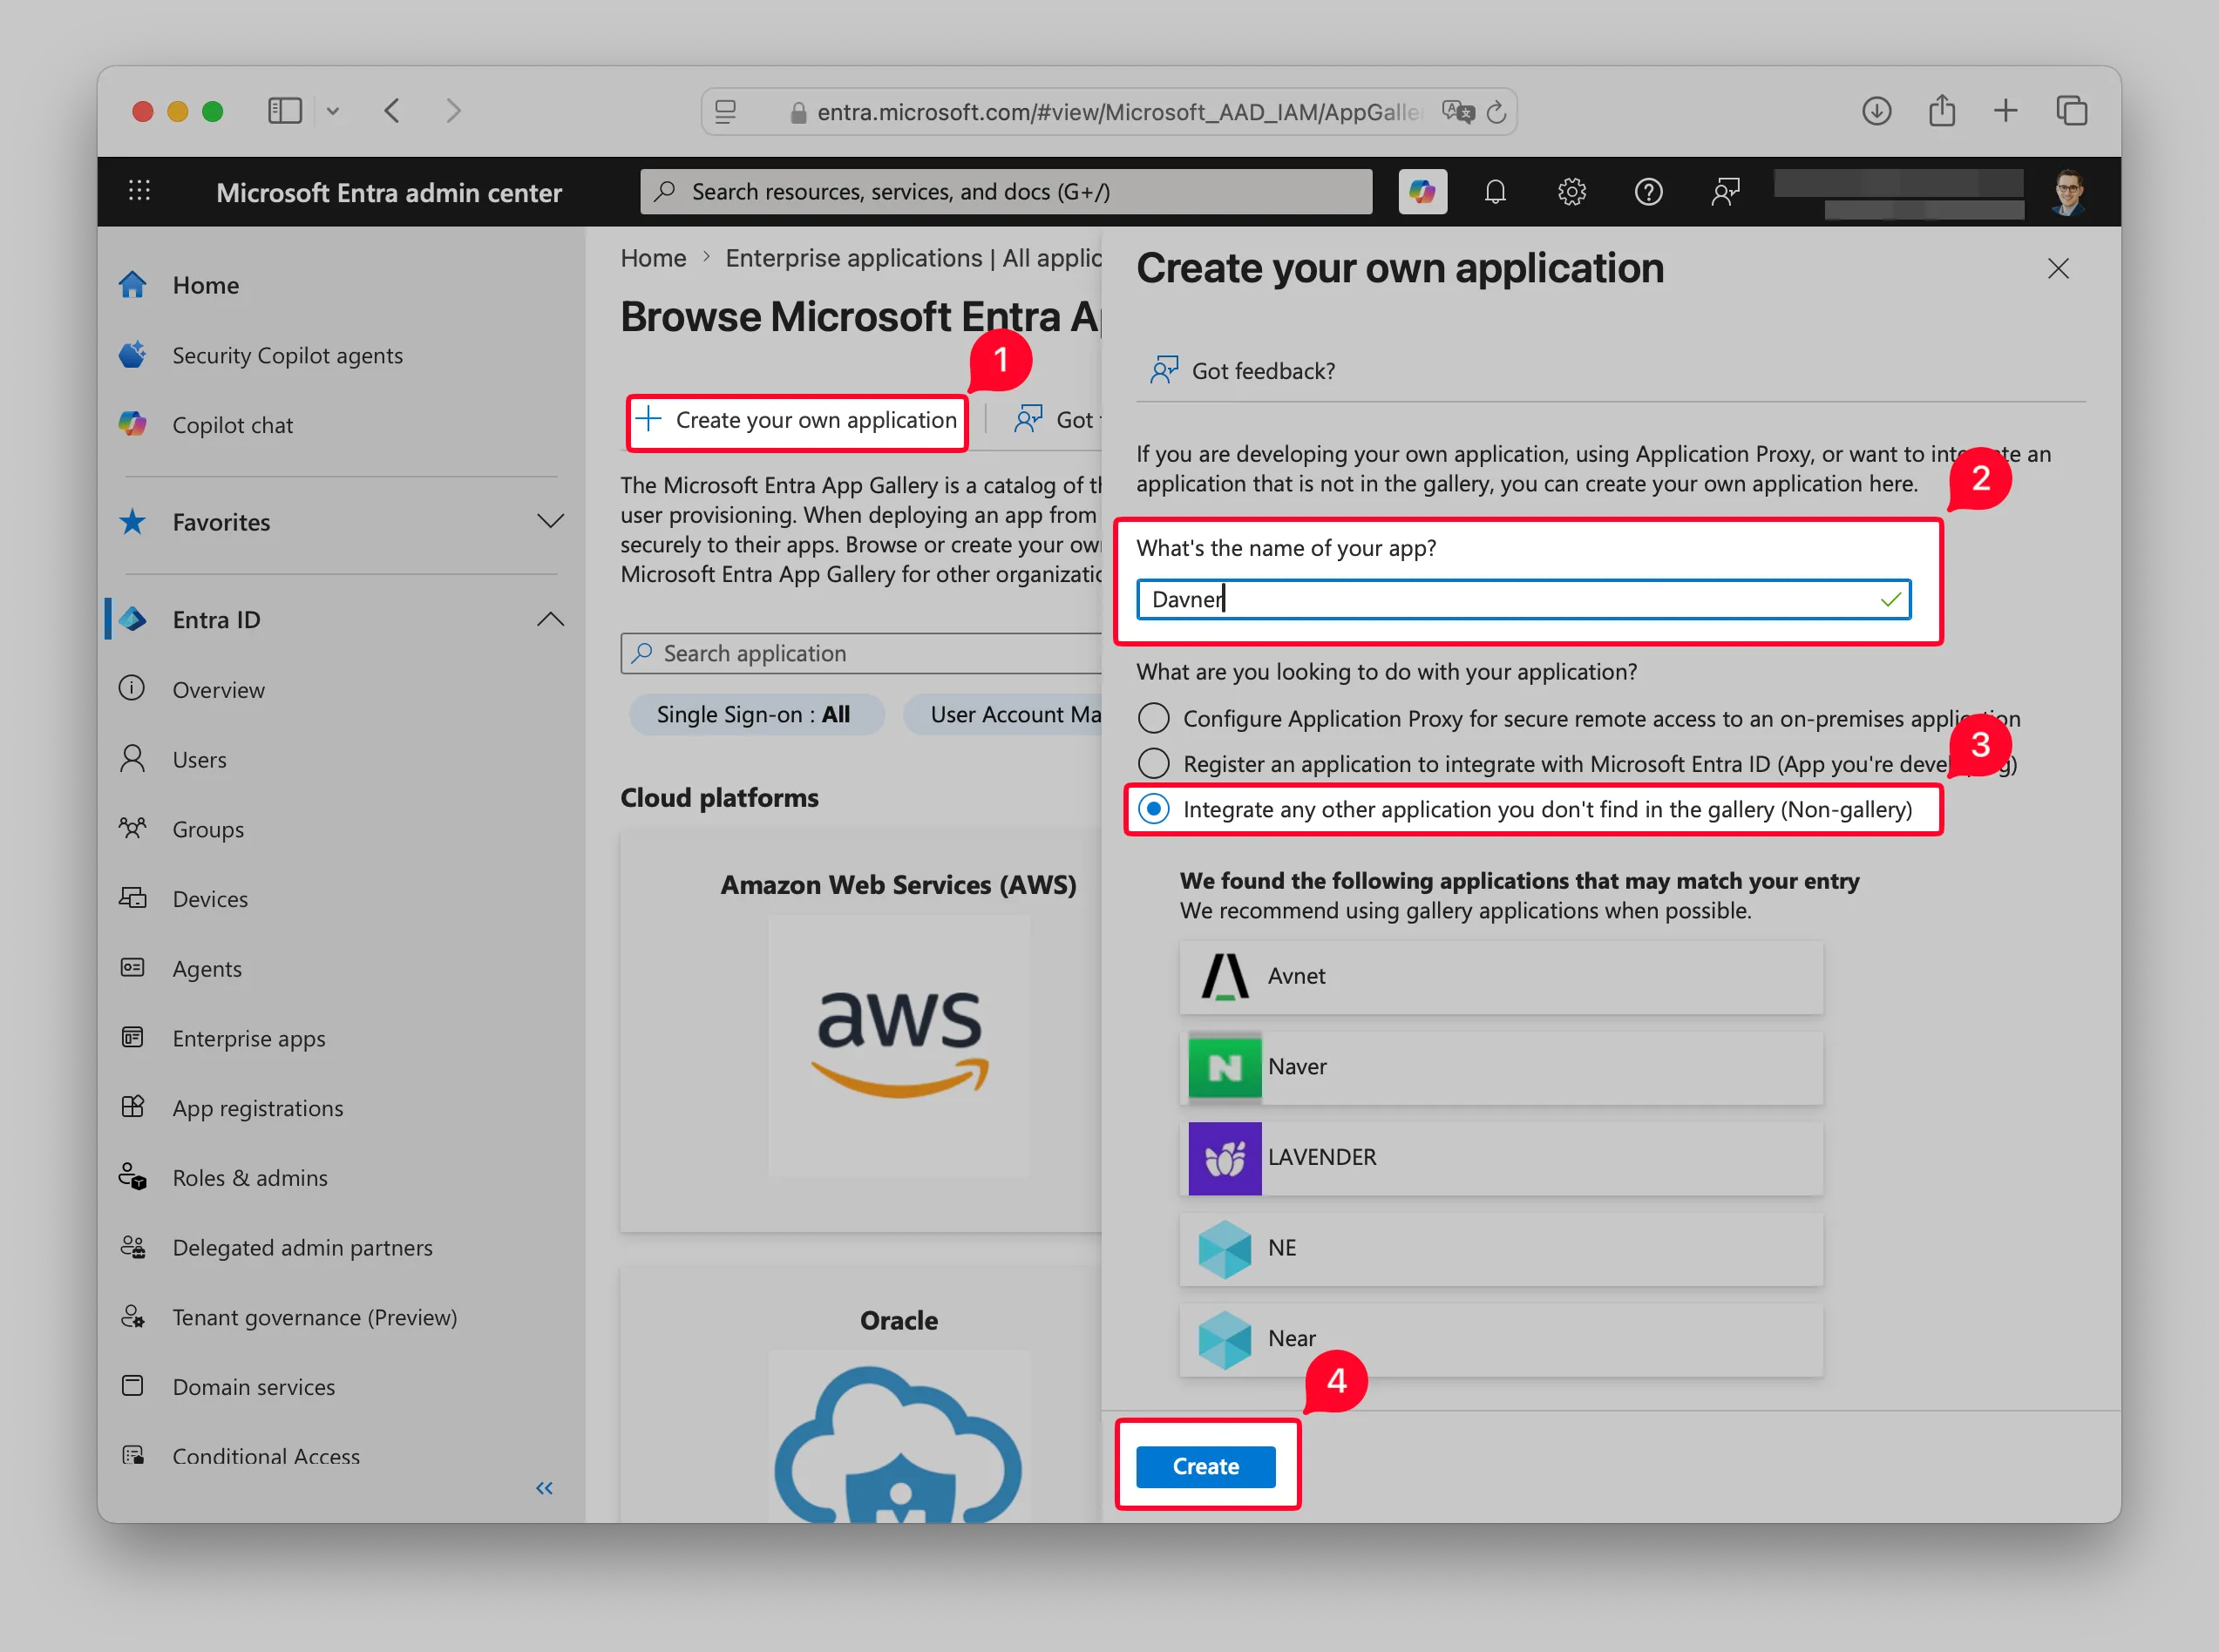
Select Create your own application and name it Davner. Choose Integrate any other application you don’t find in the gallery (Non-gallery), then select Create.
Choose who can access Davner
Open Properties in the Davner enterprise application. Assignment required? controls whether access is limited to selected users and groups or available across your Entra organization. See Microsoft’s documentation for details.
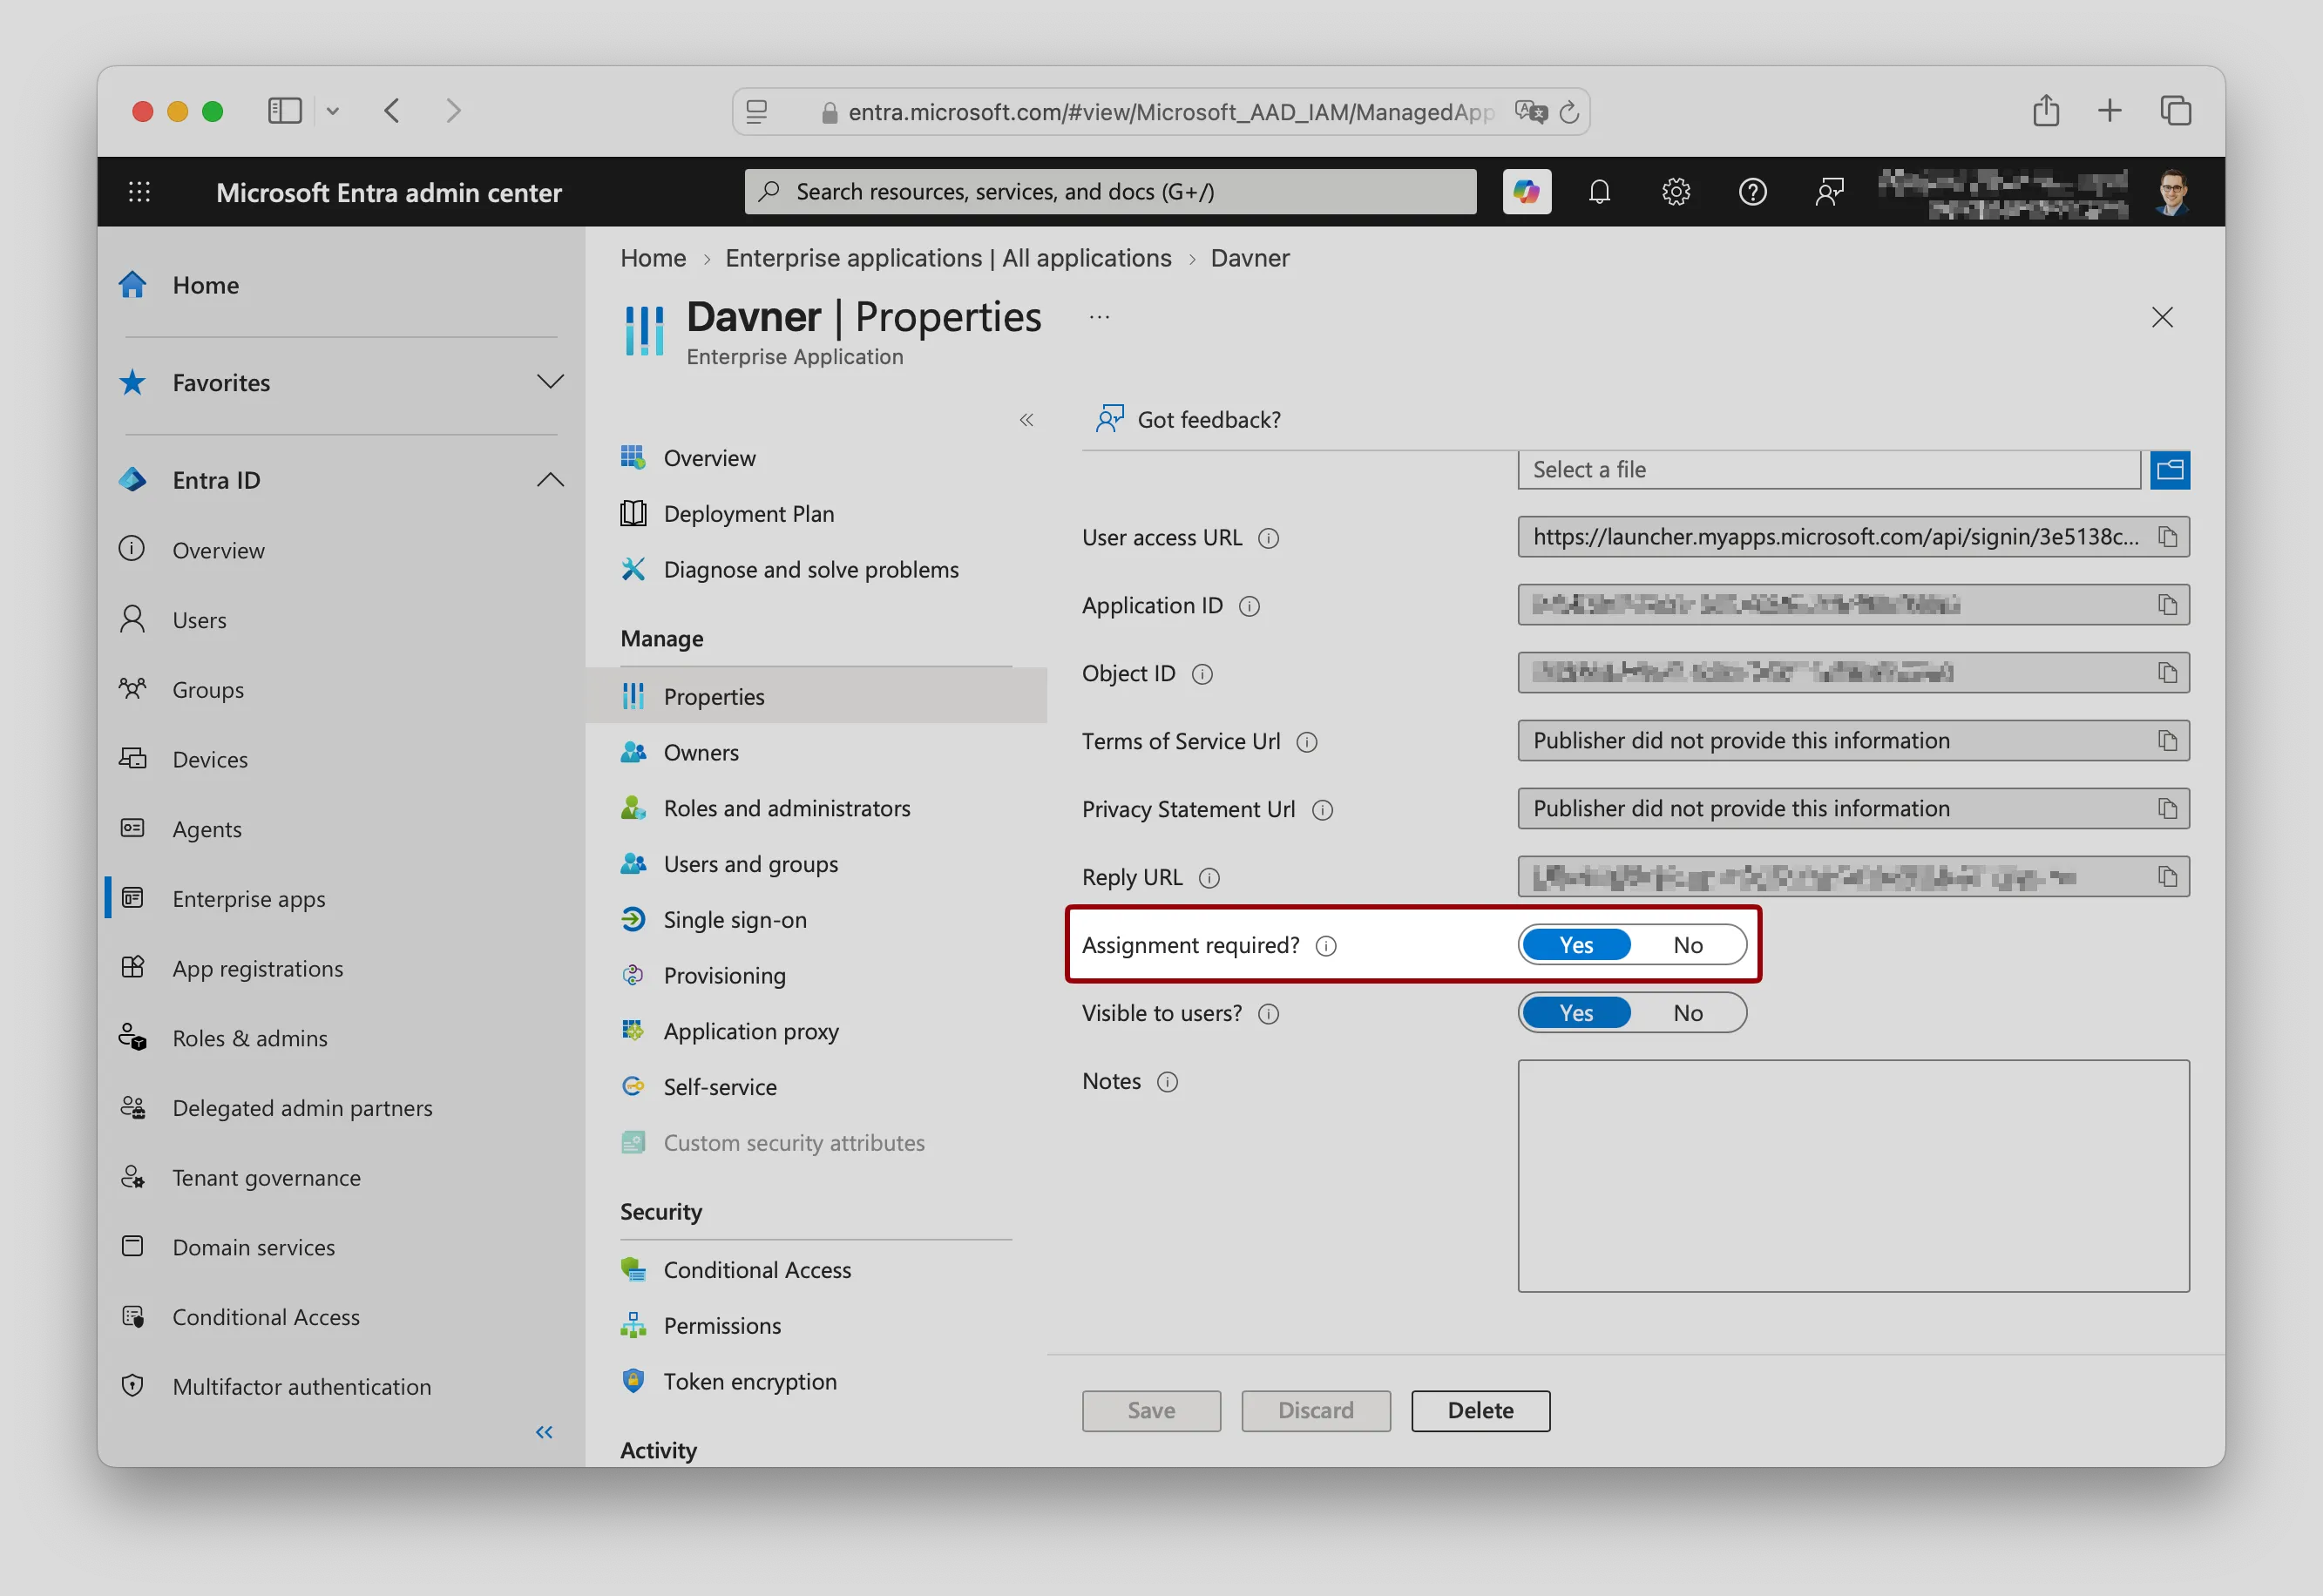
Set Assignment required? to No and select Save. Users in your Entra organization can sign in without individual or group assignments.
Set Assignment required? to Yes and select Save if you changed it. Then assign the people who should have access:
-
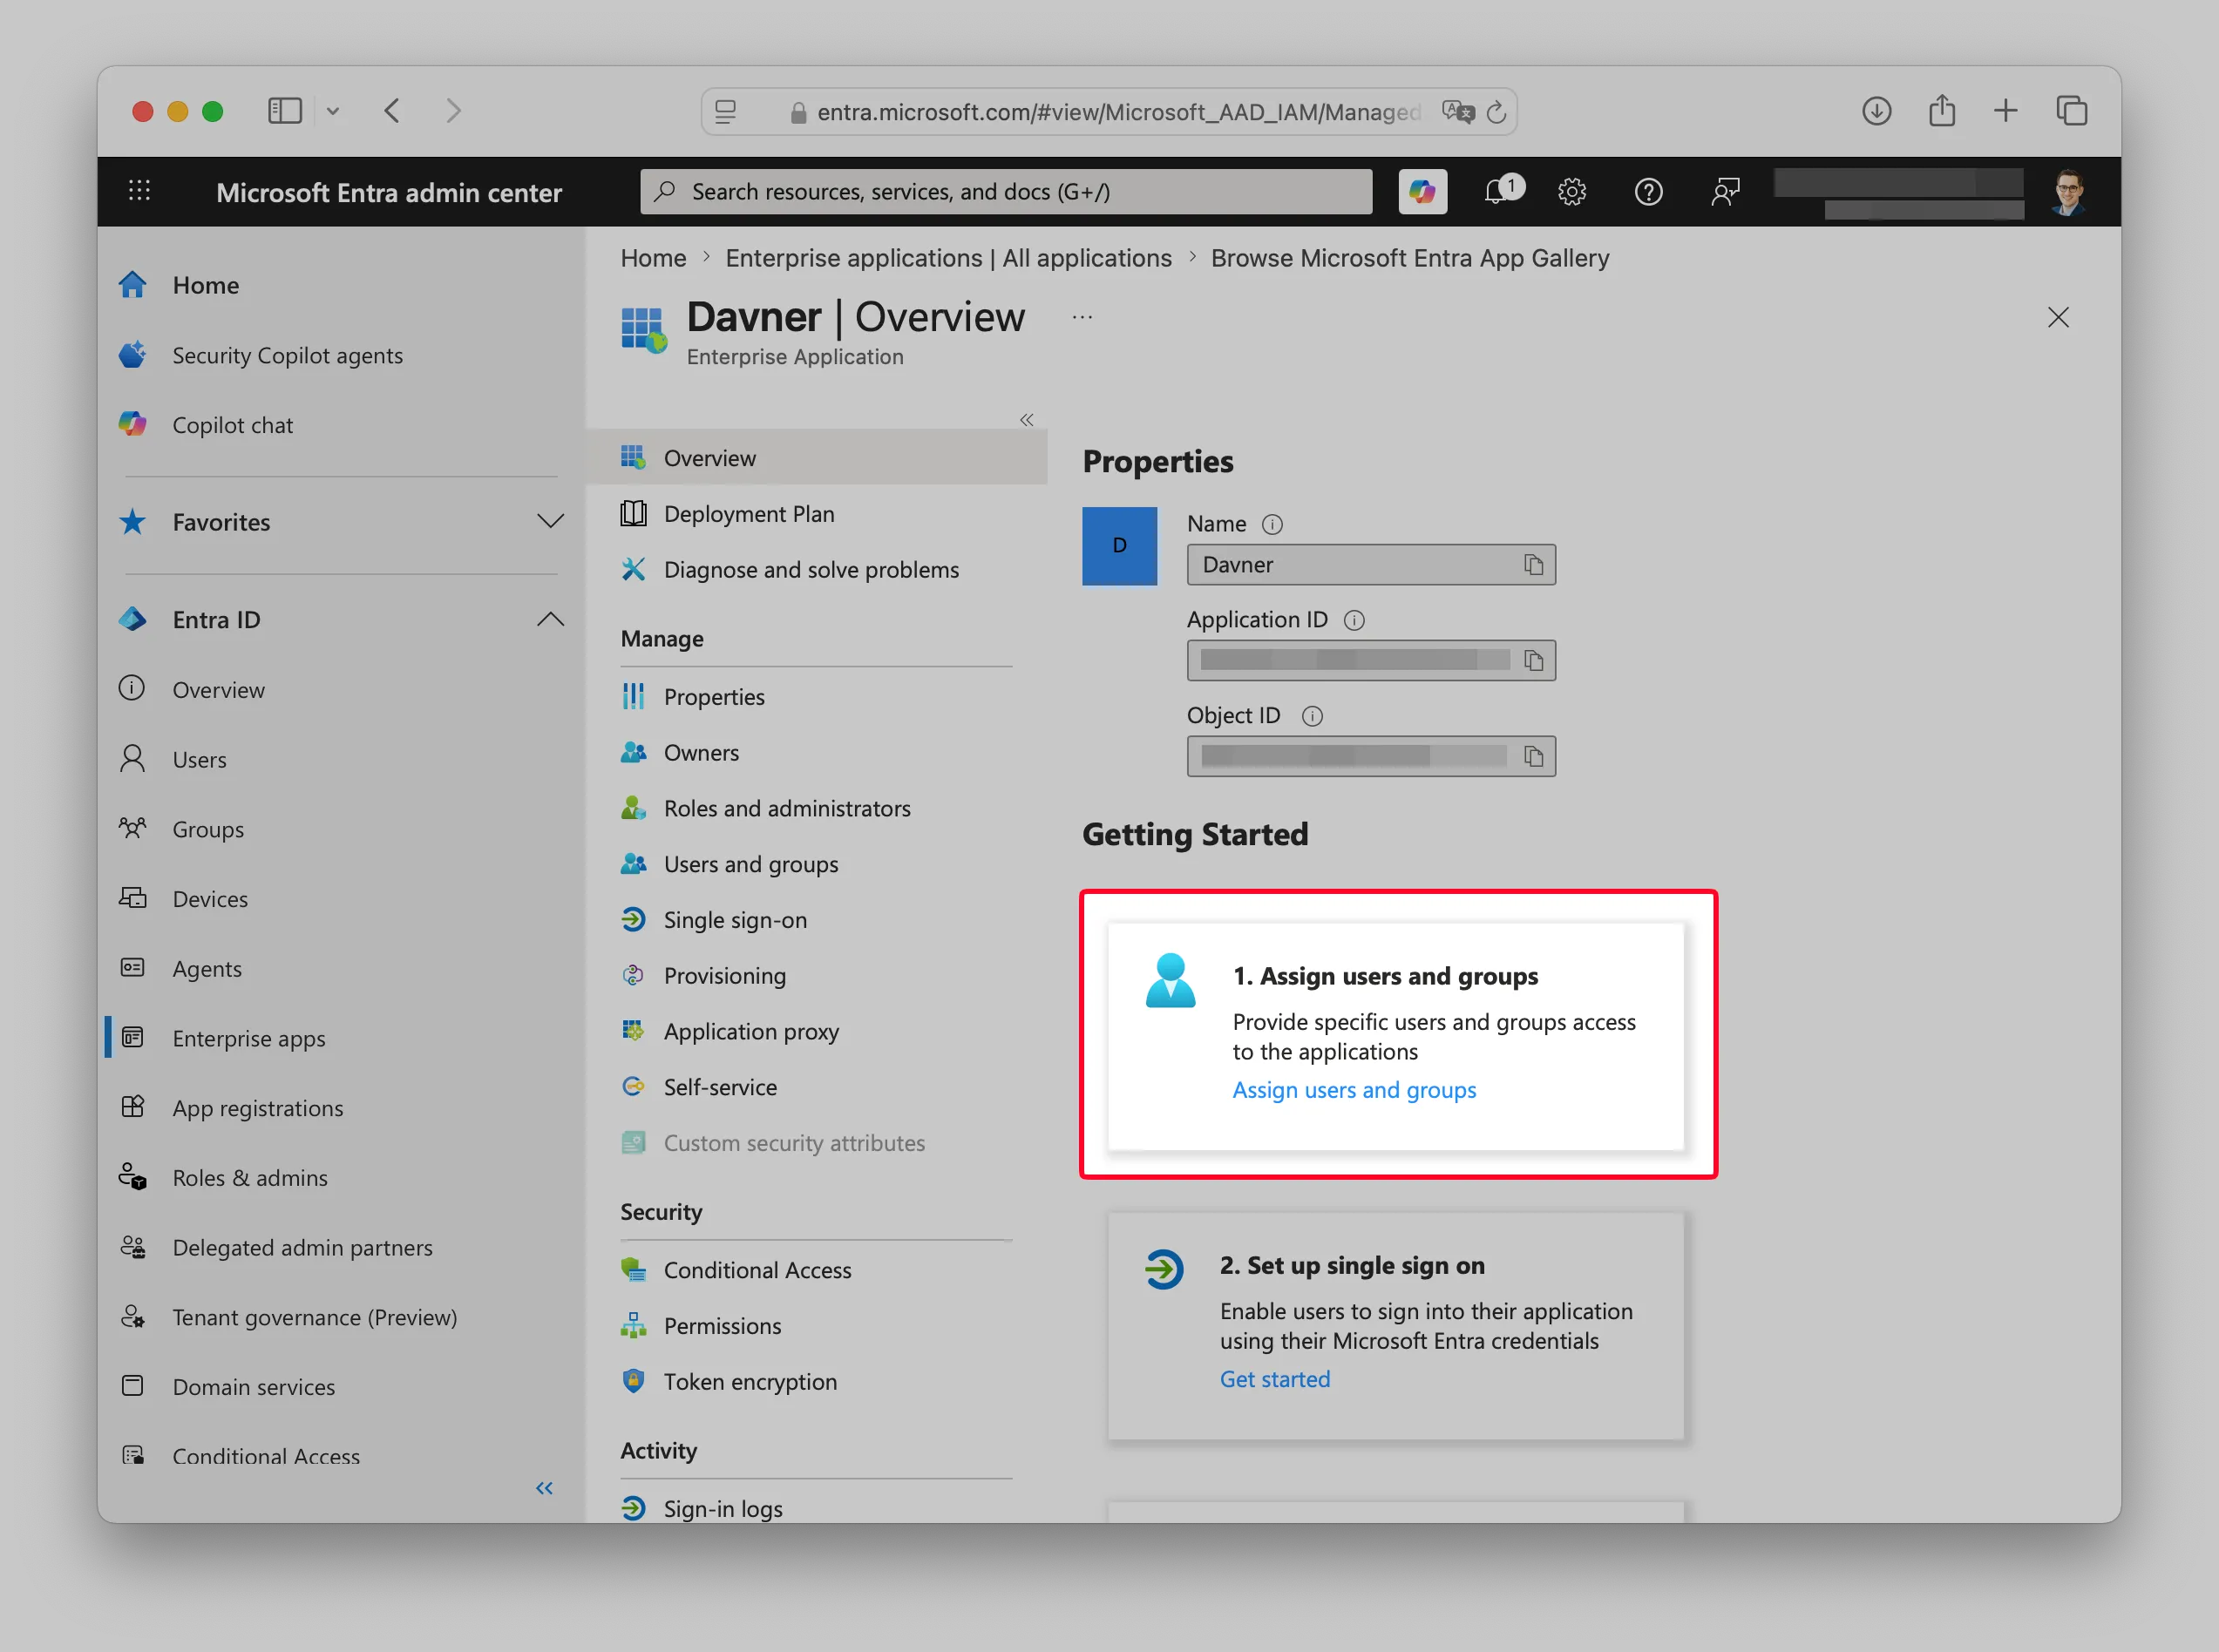
Return to the application’s Overview page, then select Assign users and groups.
-
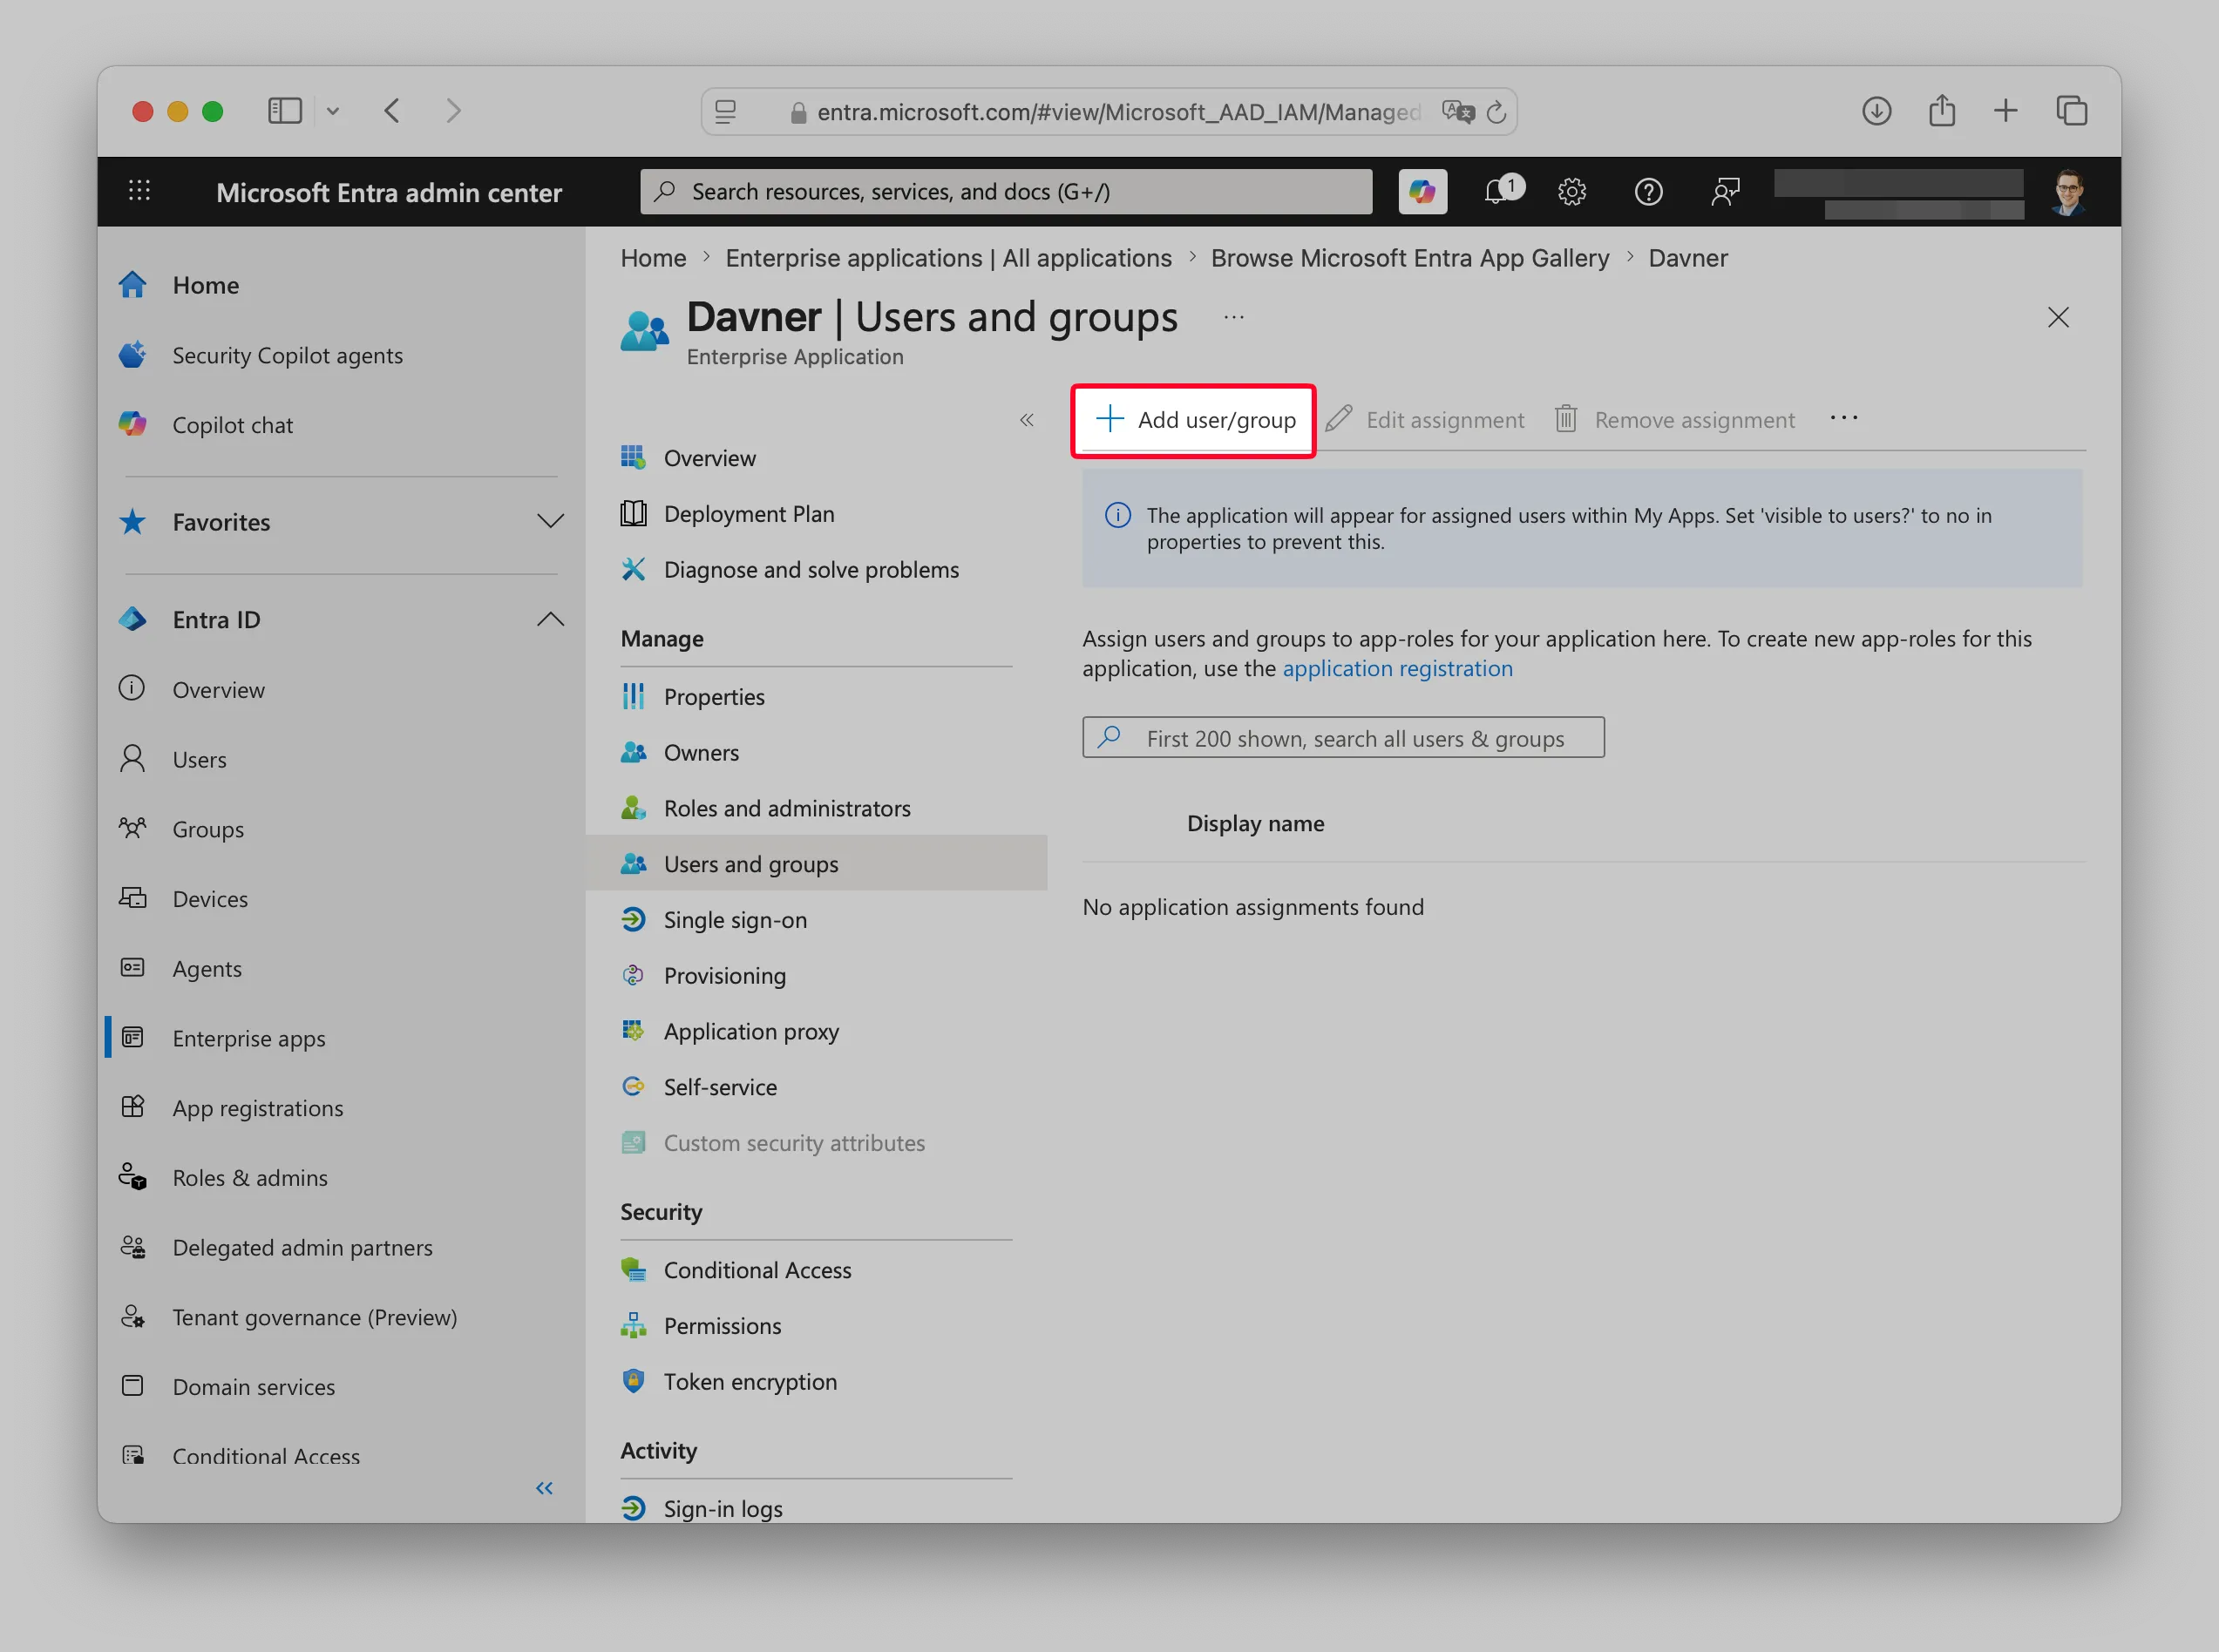
Select Add user/group.
-
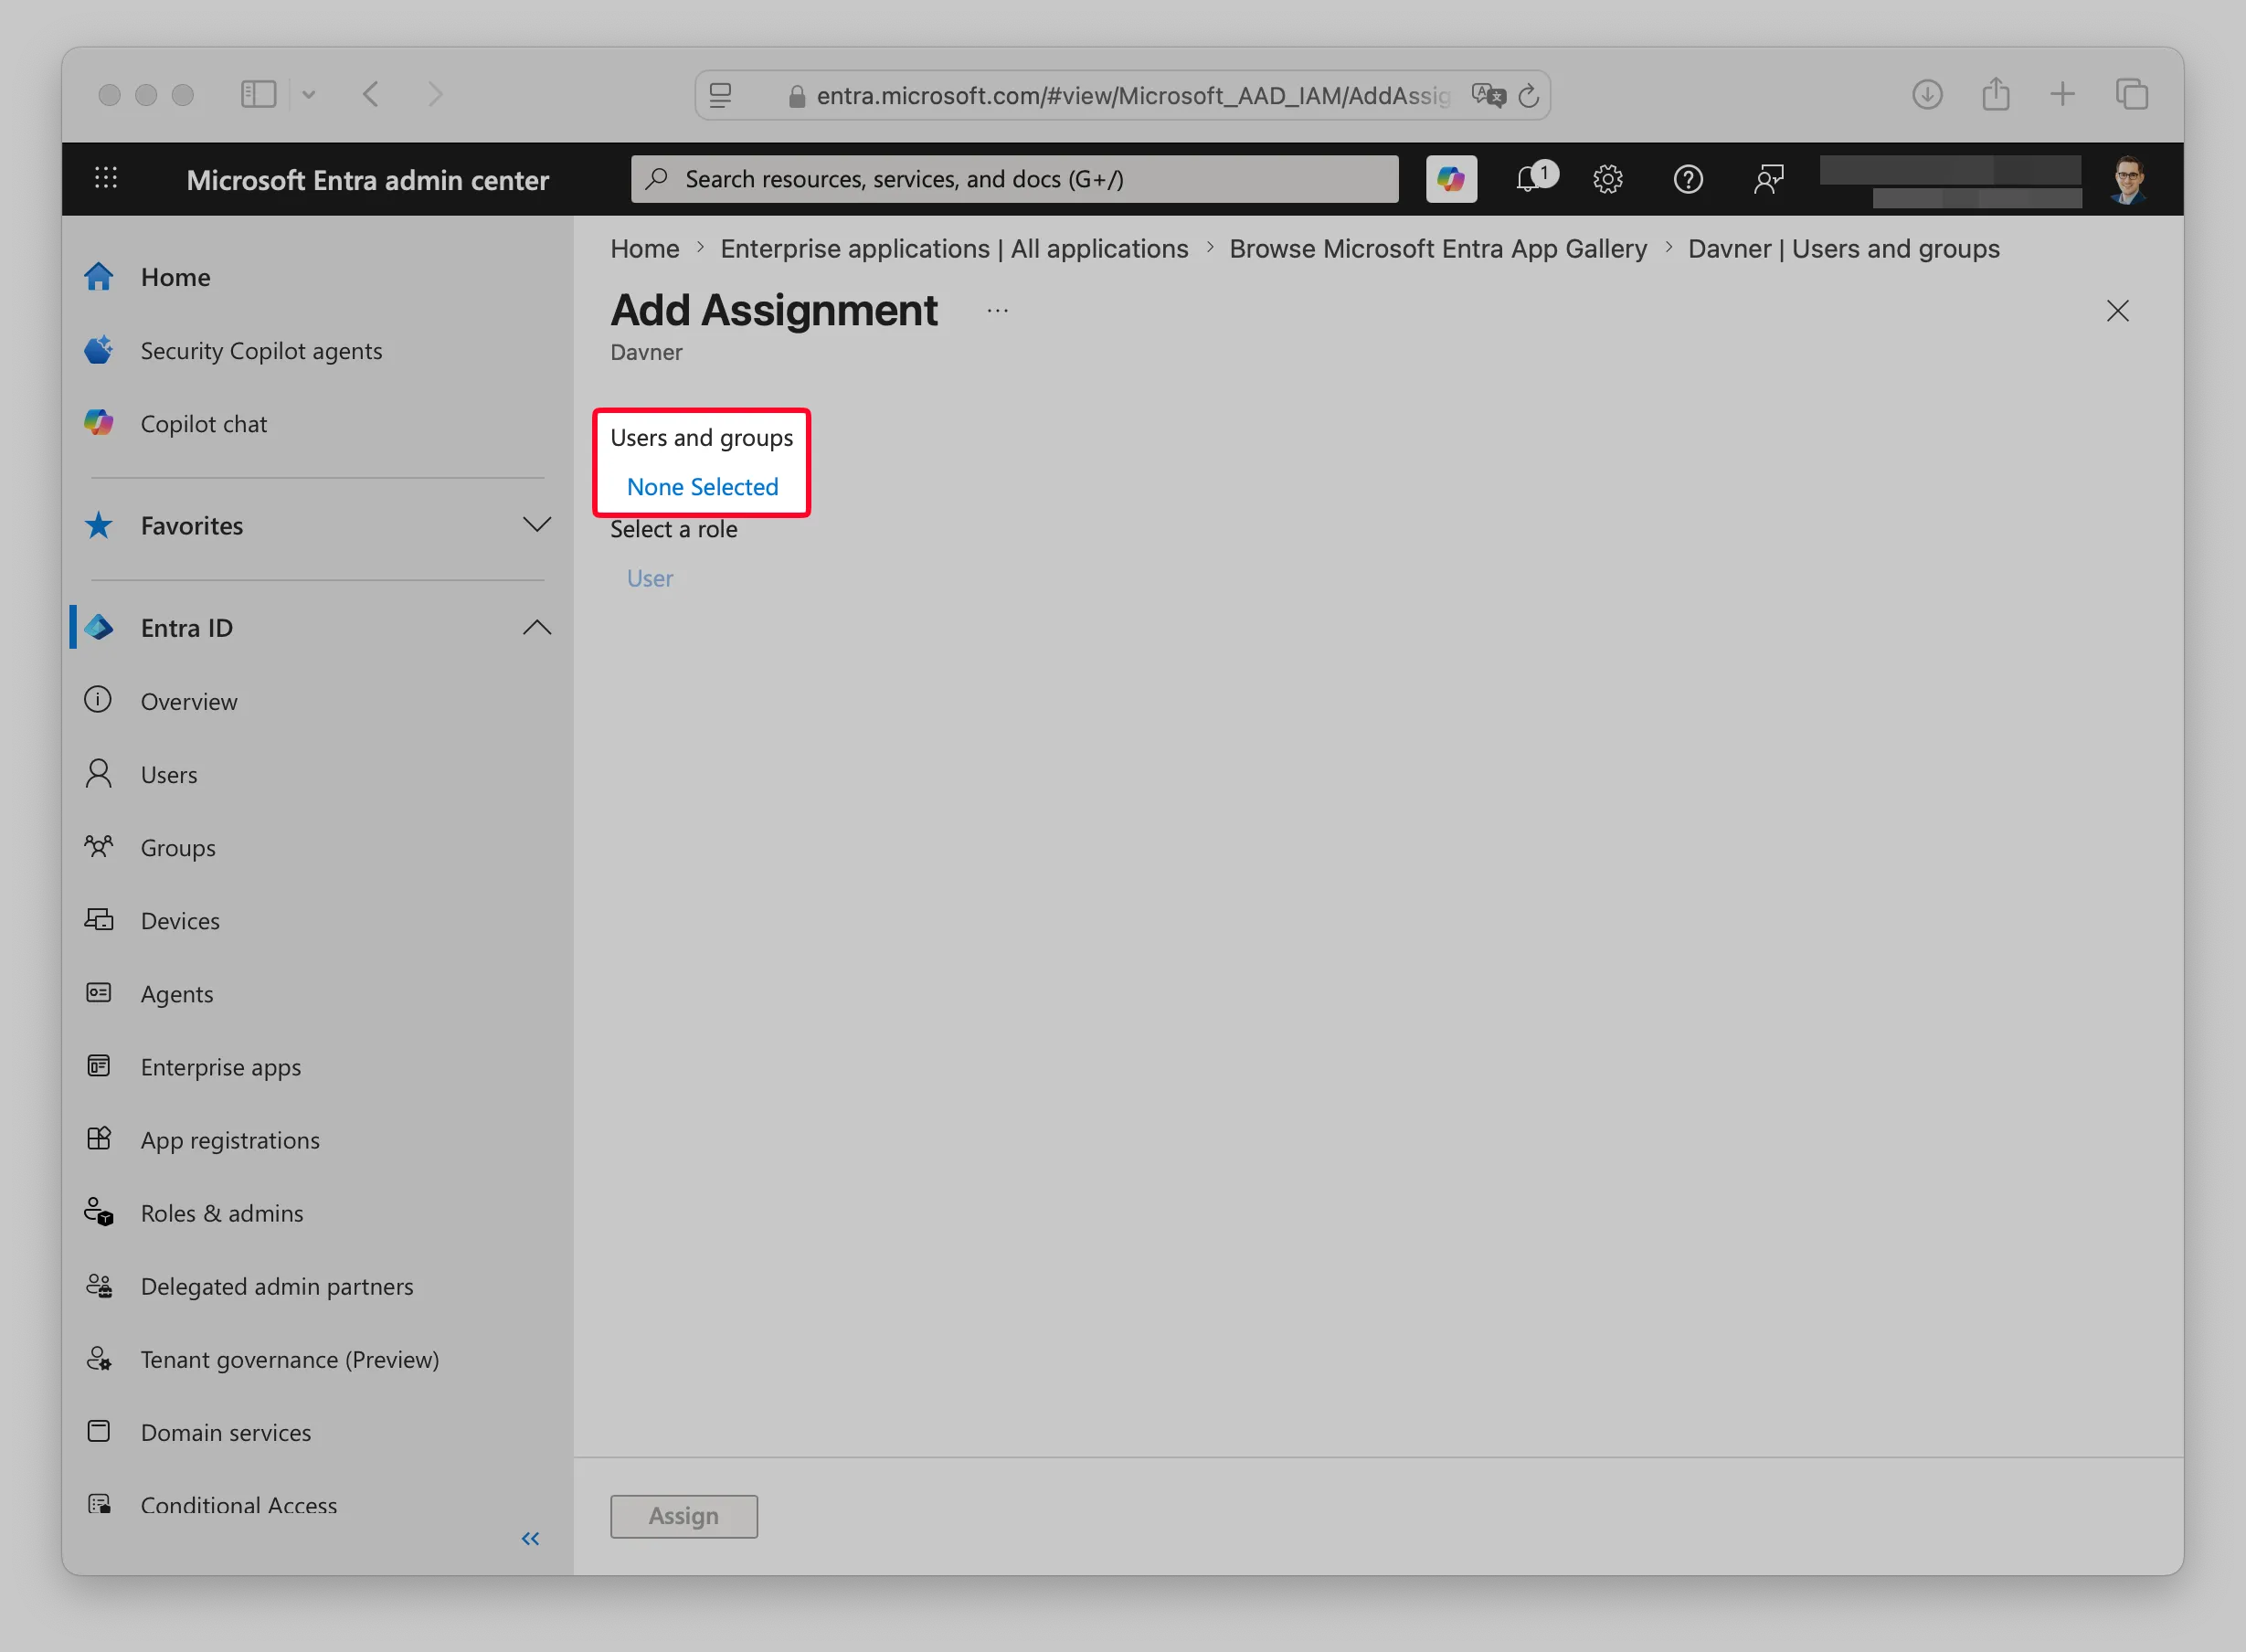
Under Users and groups, select None Selected.
-
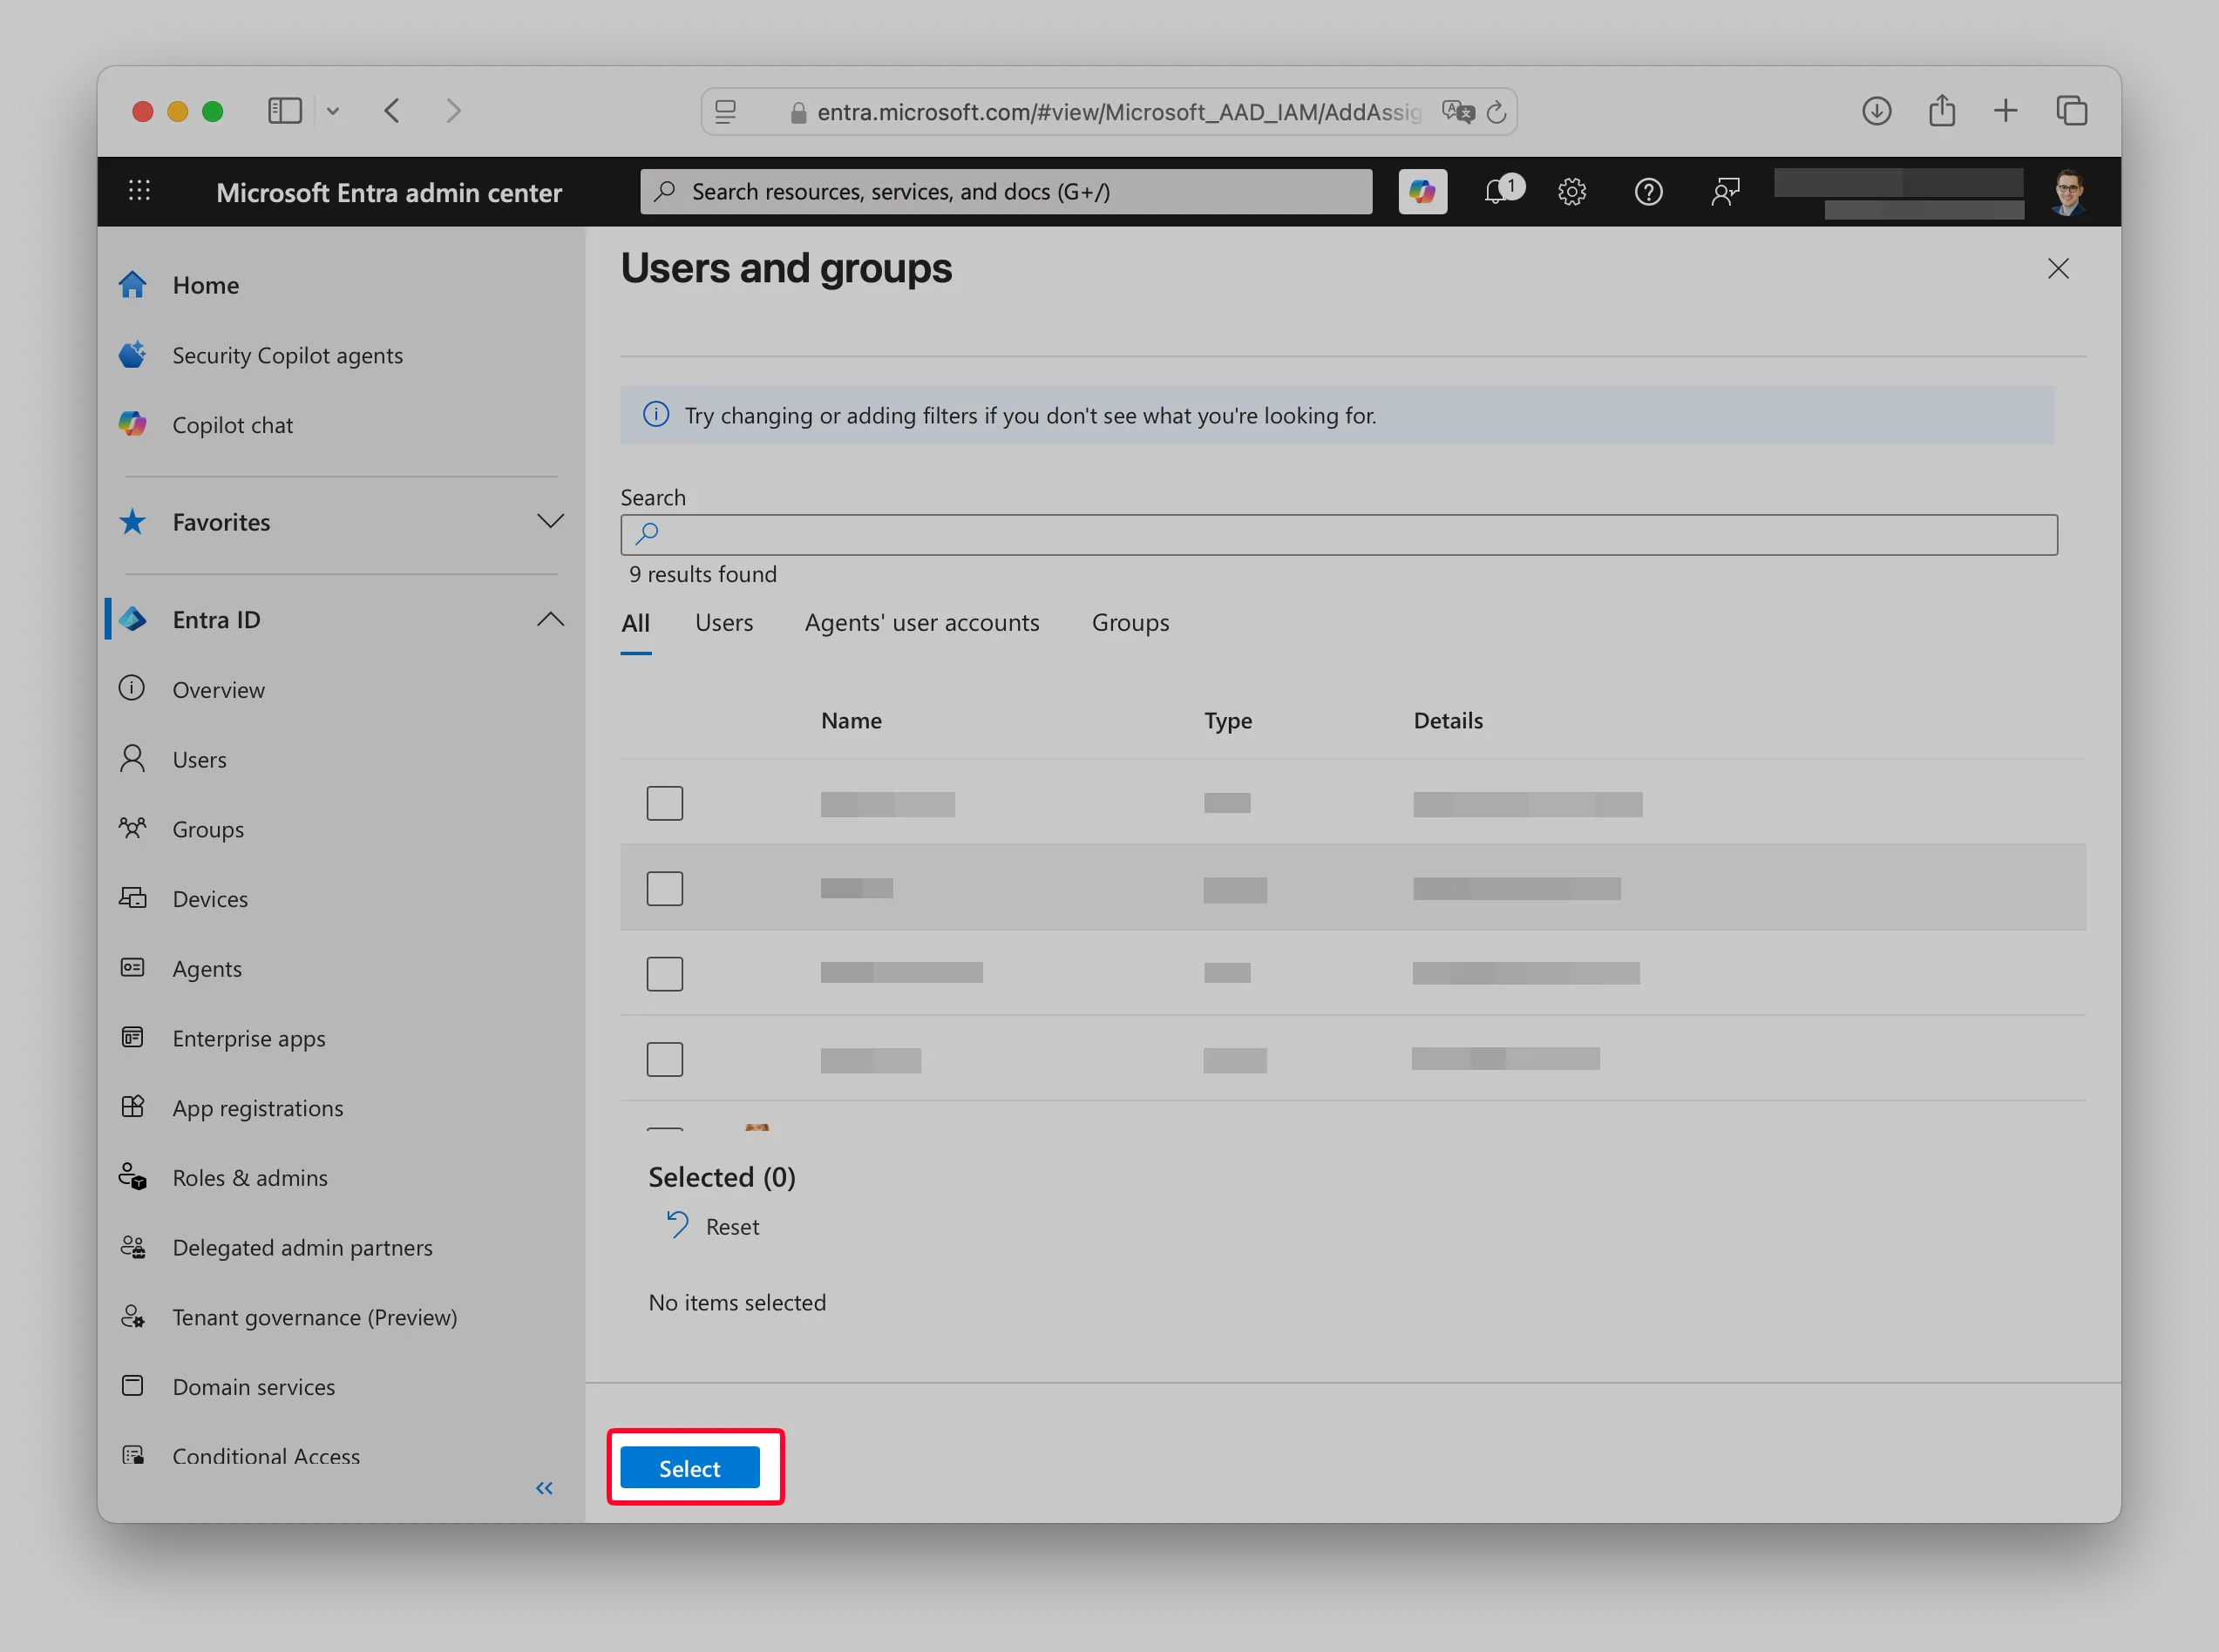
Choose the users or groups that need access to Davner. Select Select, then Assign.
Choose SAML for single sign-on
Open Single sign-on in the Davner enterprise application’s menu and select SAML.
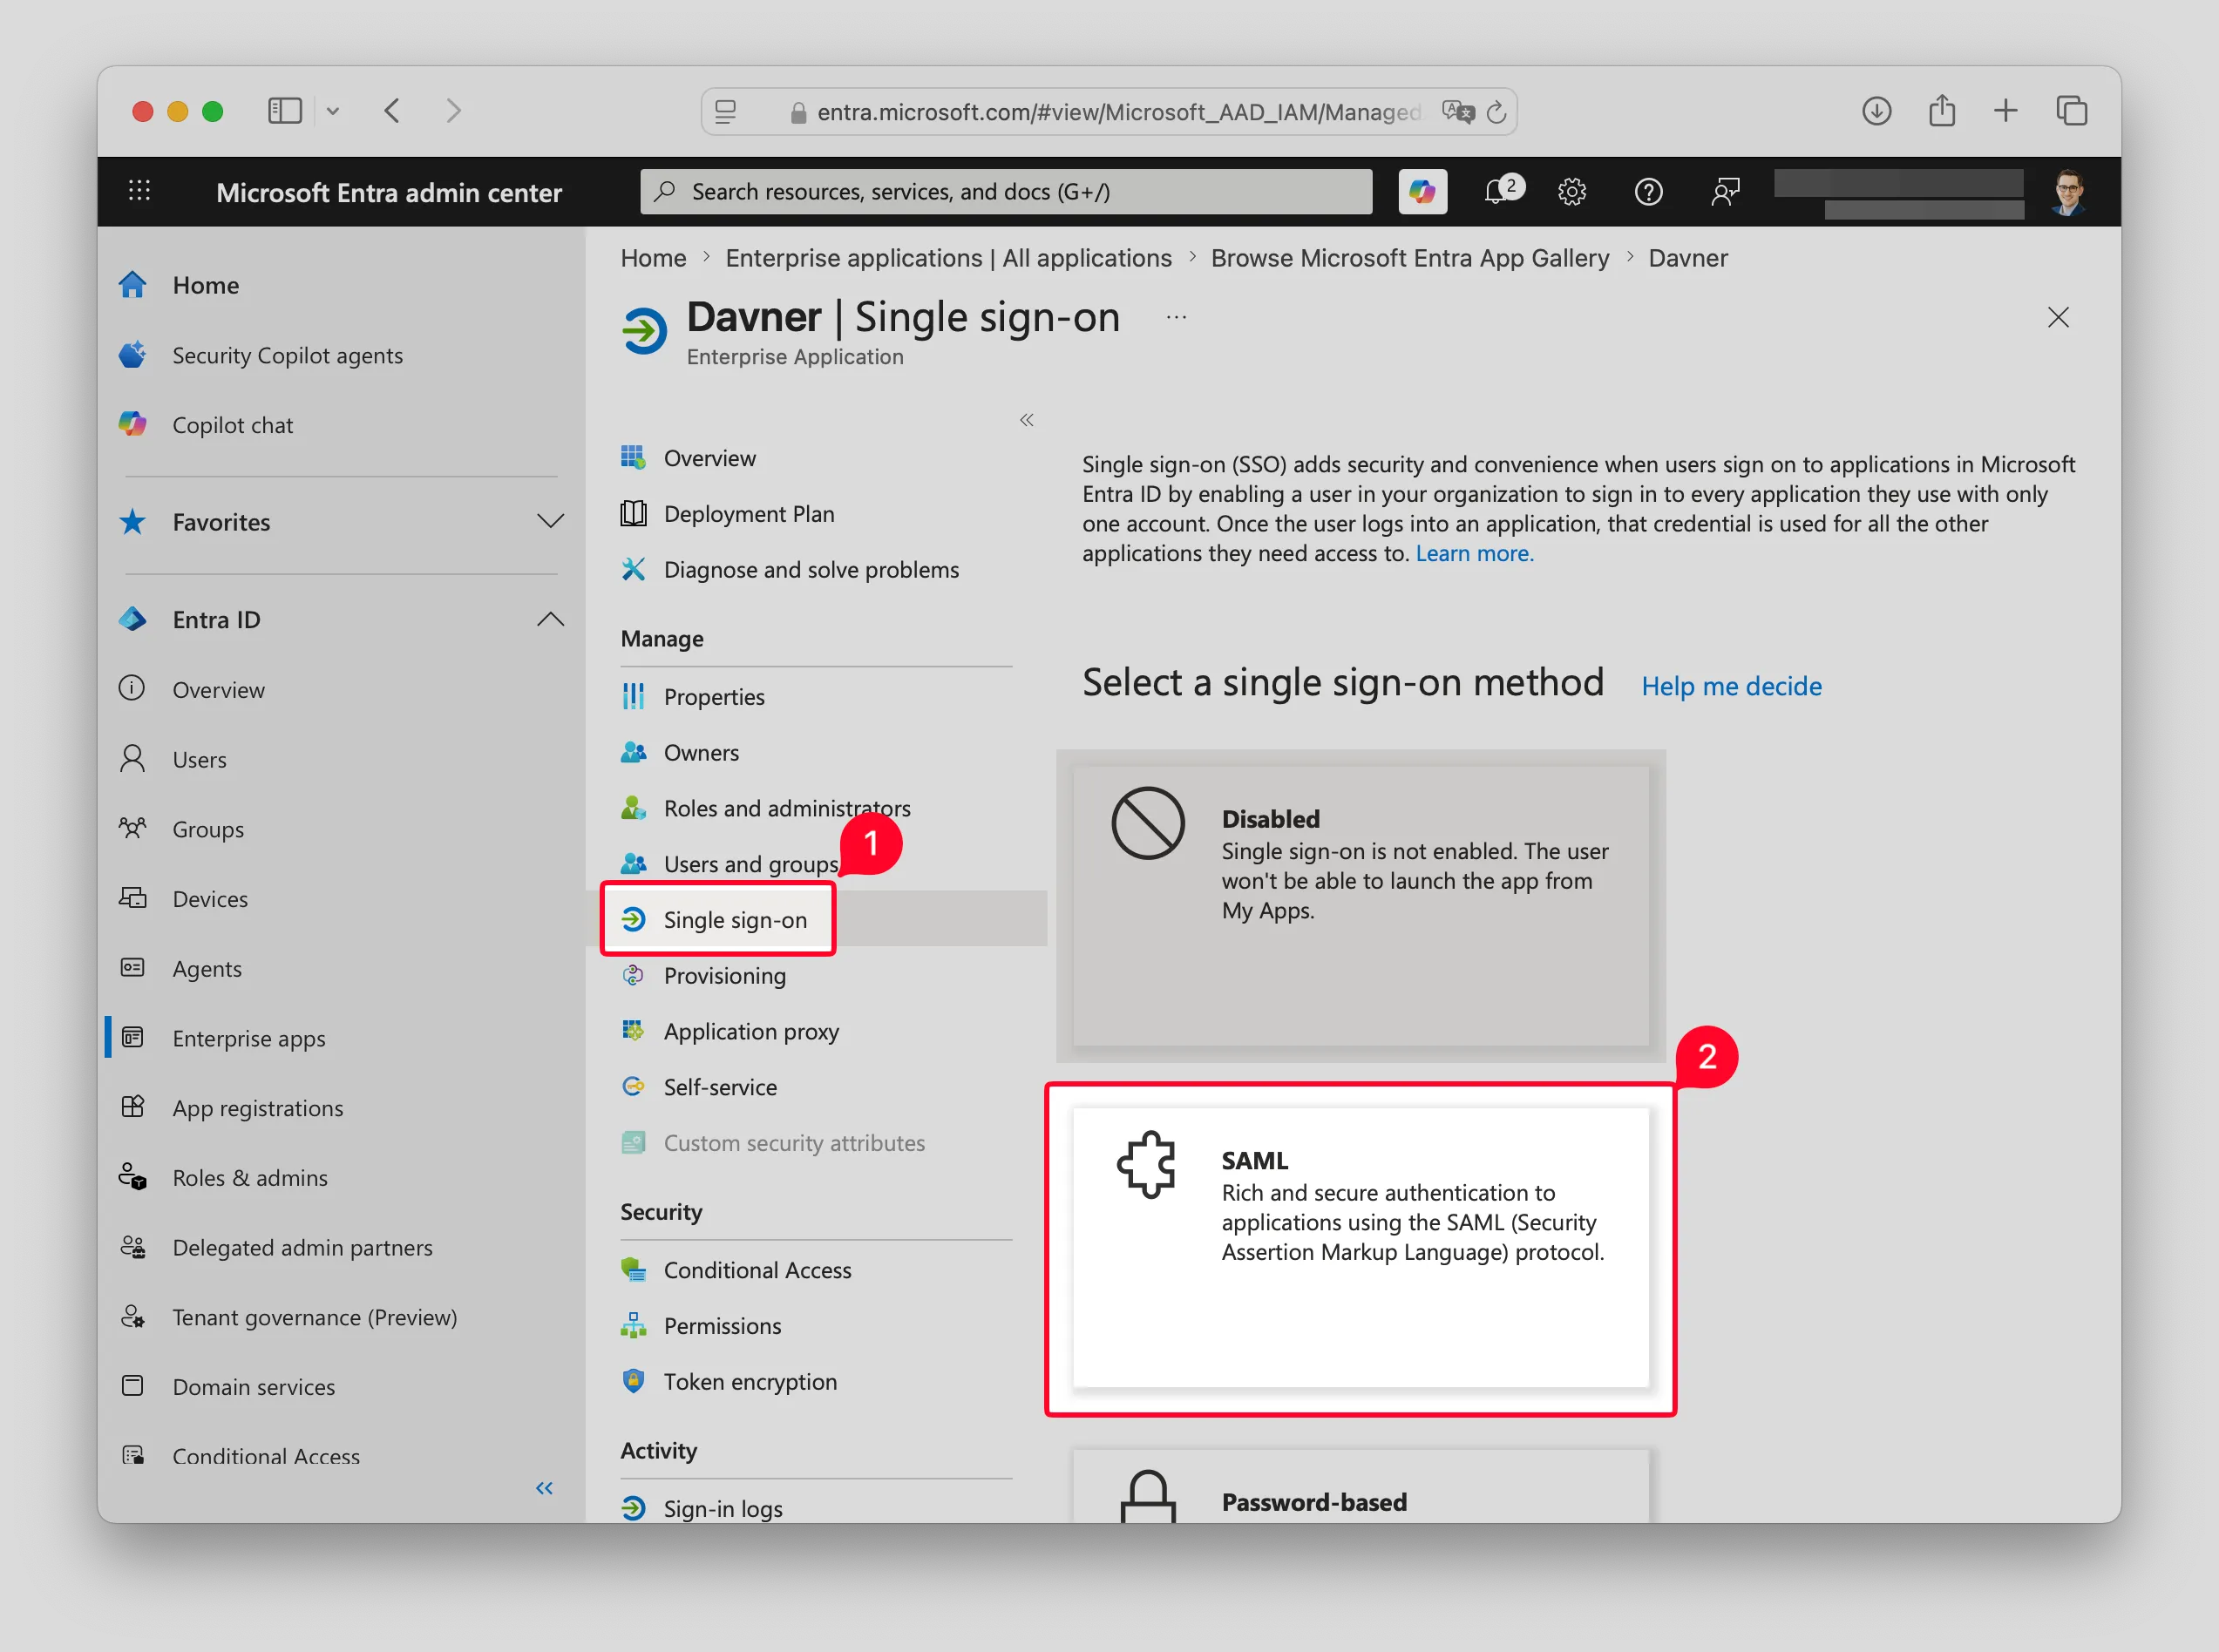
Edit the basic SAML configuration
In Basic SAML Configuration, select Edit.
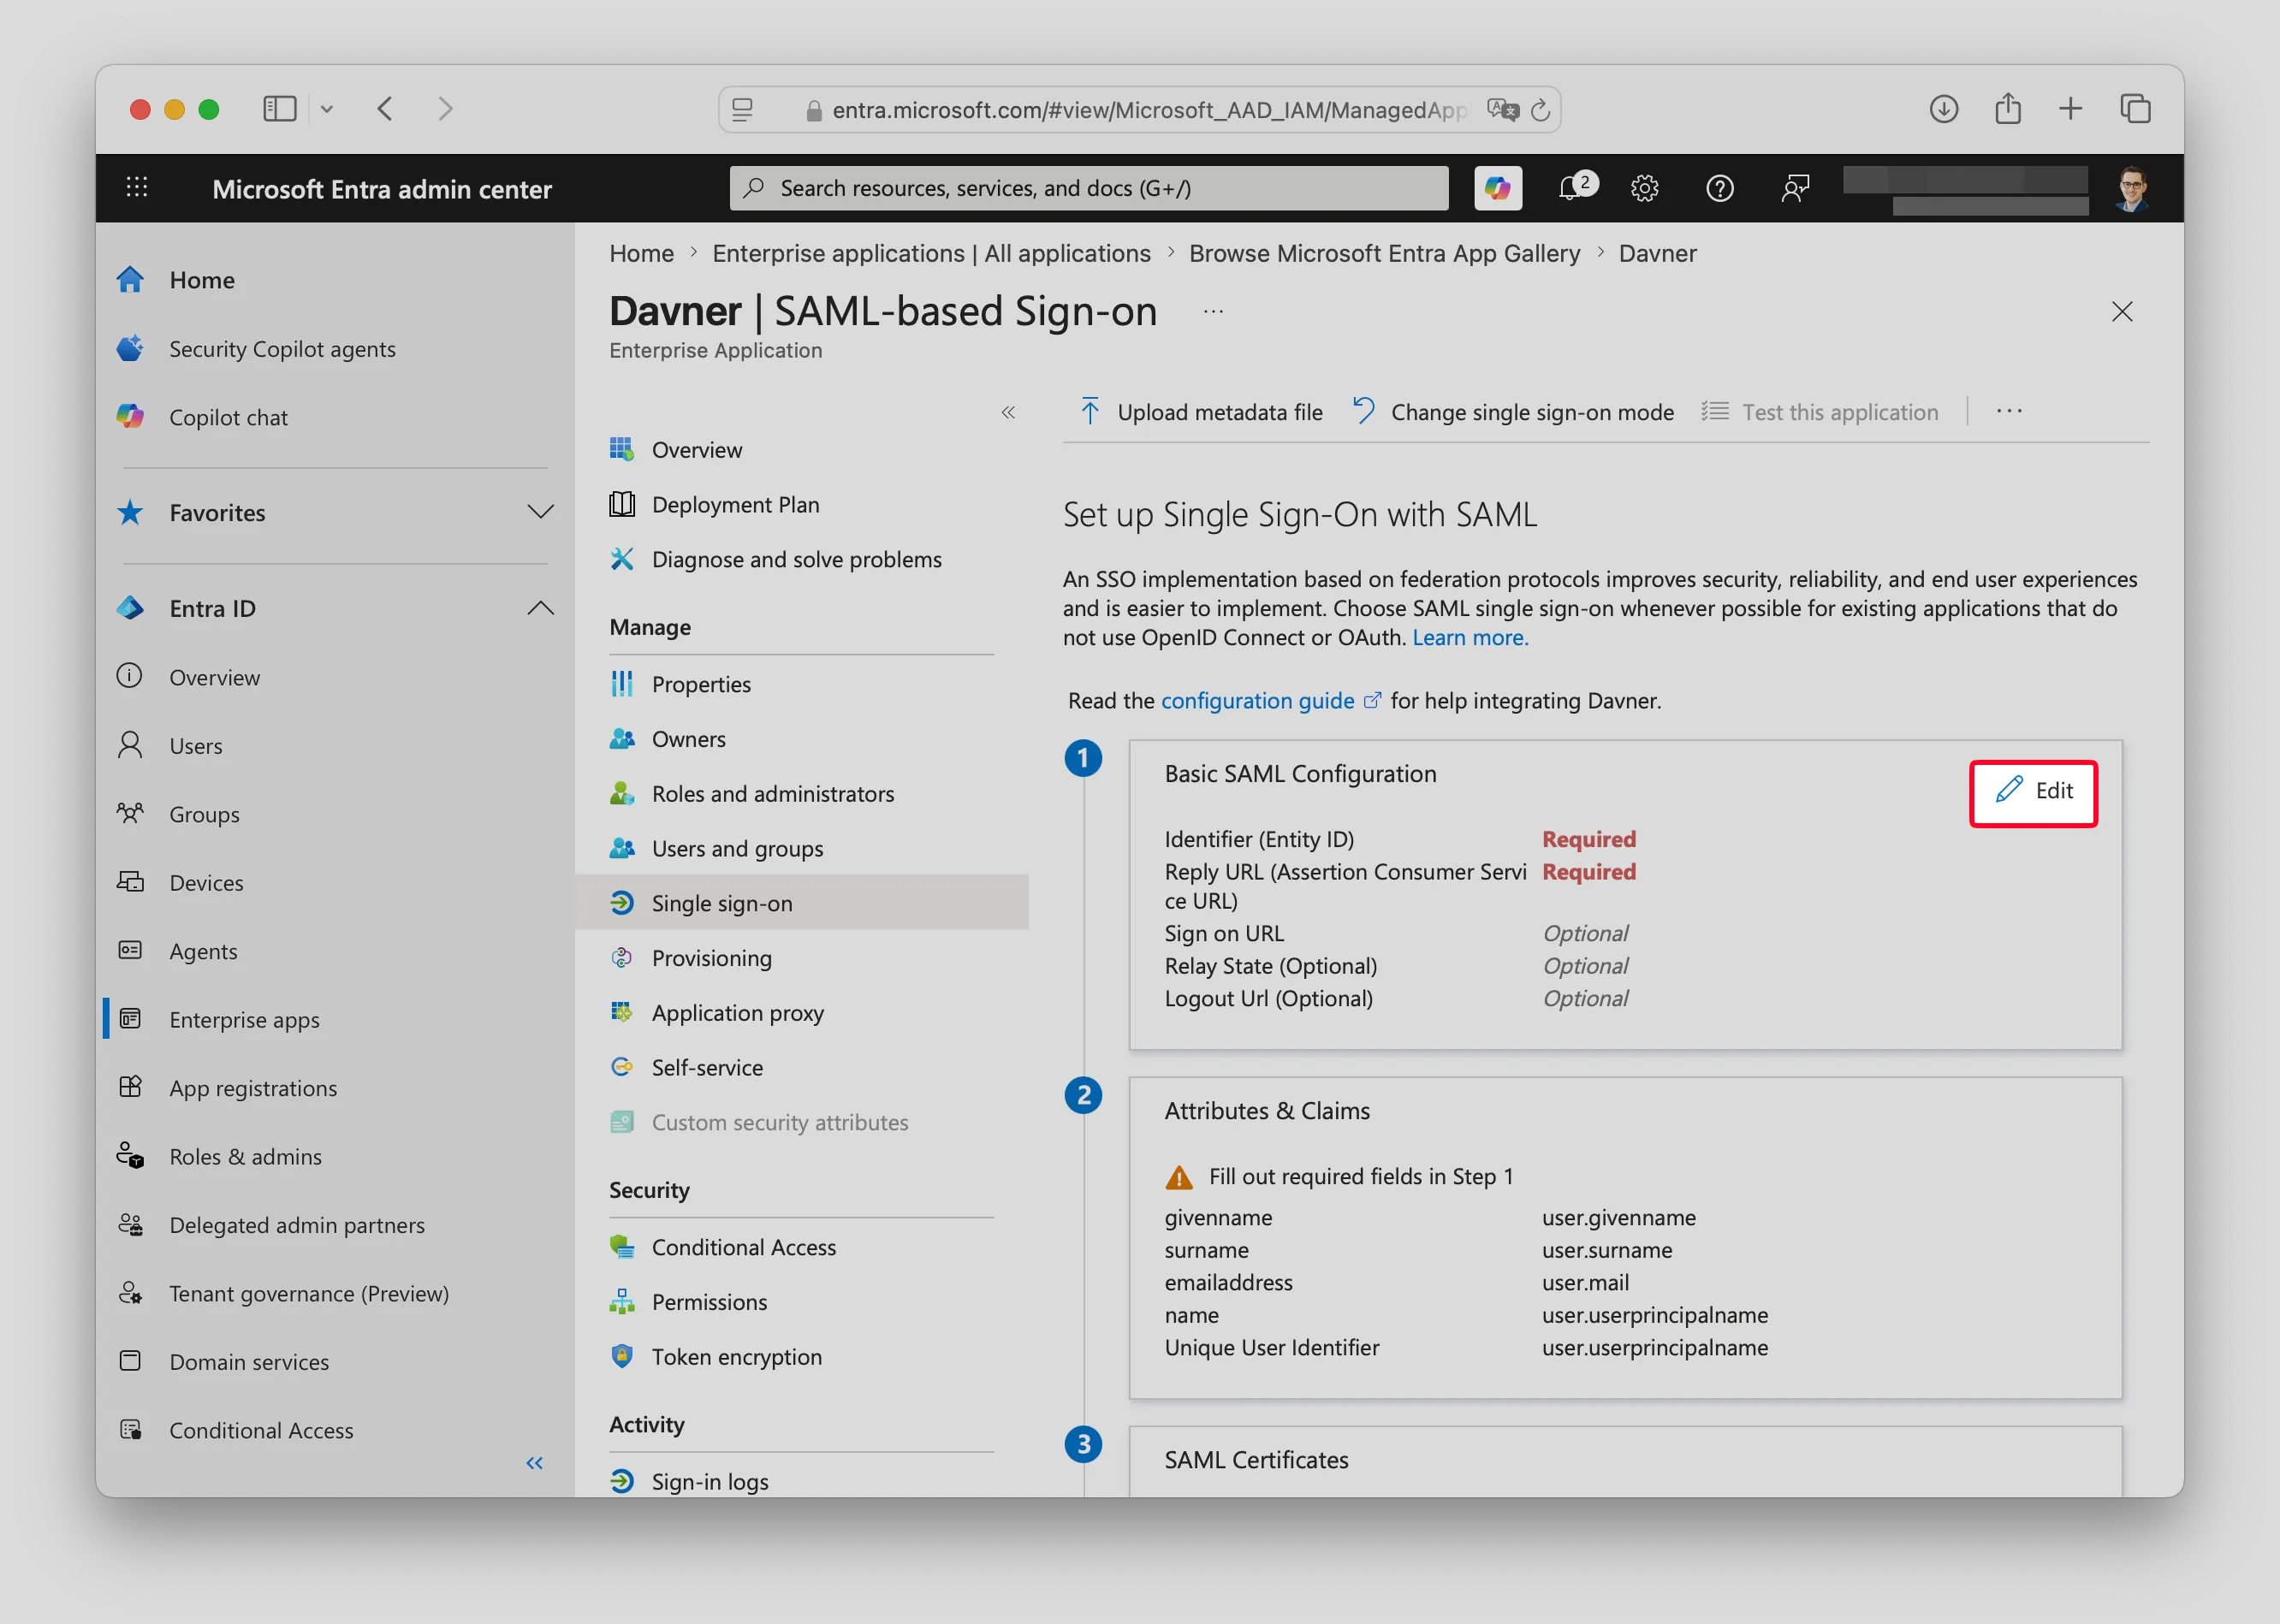
Copy the Davner connection values into Entra
Copy the values displayed for your connection in Davner’s SSO settings into the matching Entra fields:
| Microsoft Entra field | Value from Davner |
|---|---|
| Identifier (Entity ID) | Identifier (Entity ID) — https://davner.com. |
| Reply URL (Assertion Consumer Service URL) | The full Reply URL (ACS URL) displayed for this connection. |
Select Save in Entra after entering the values.
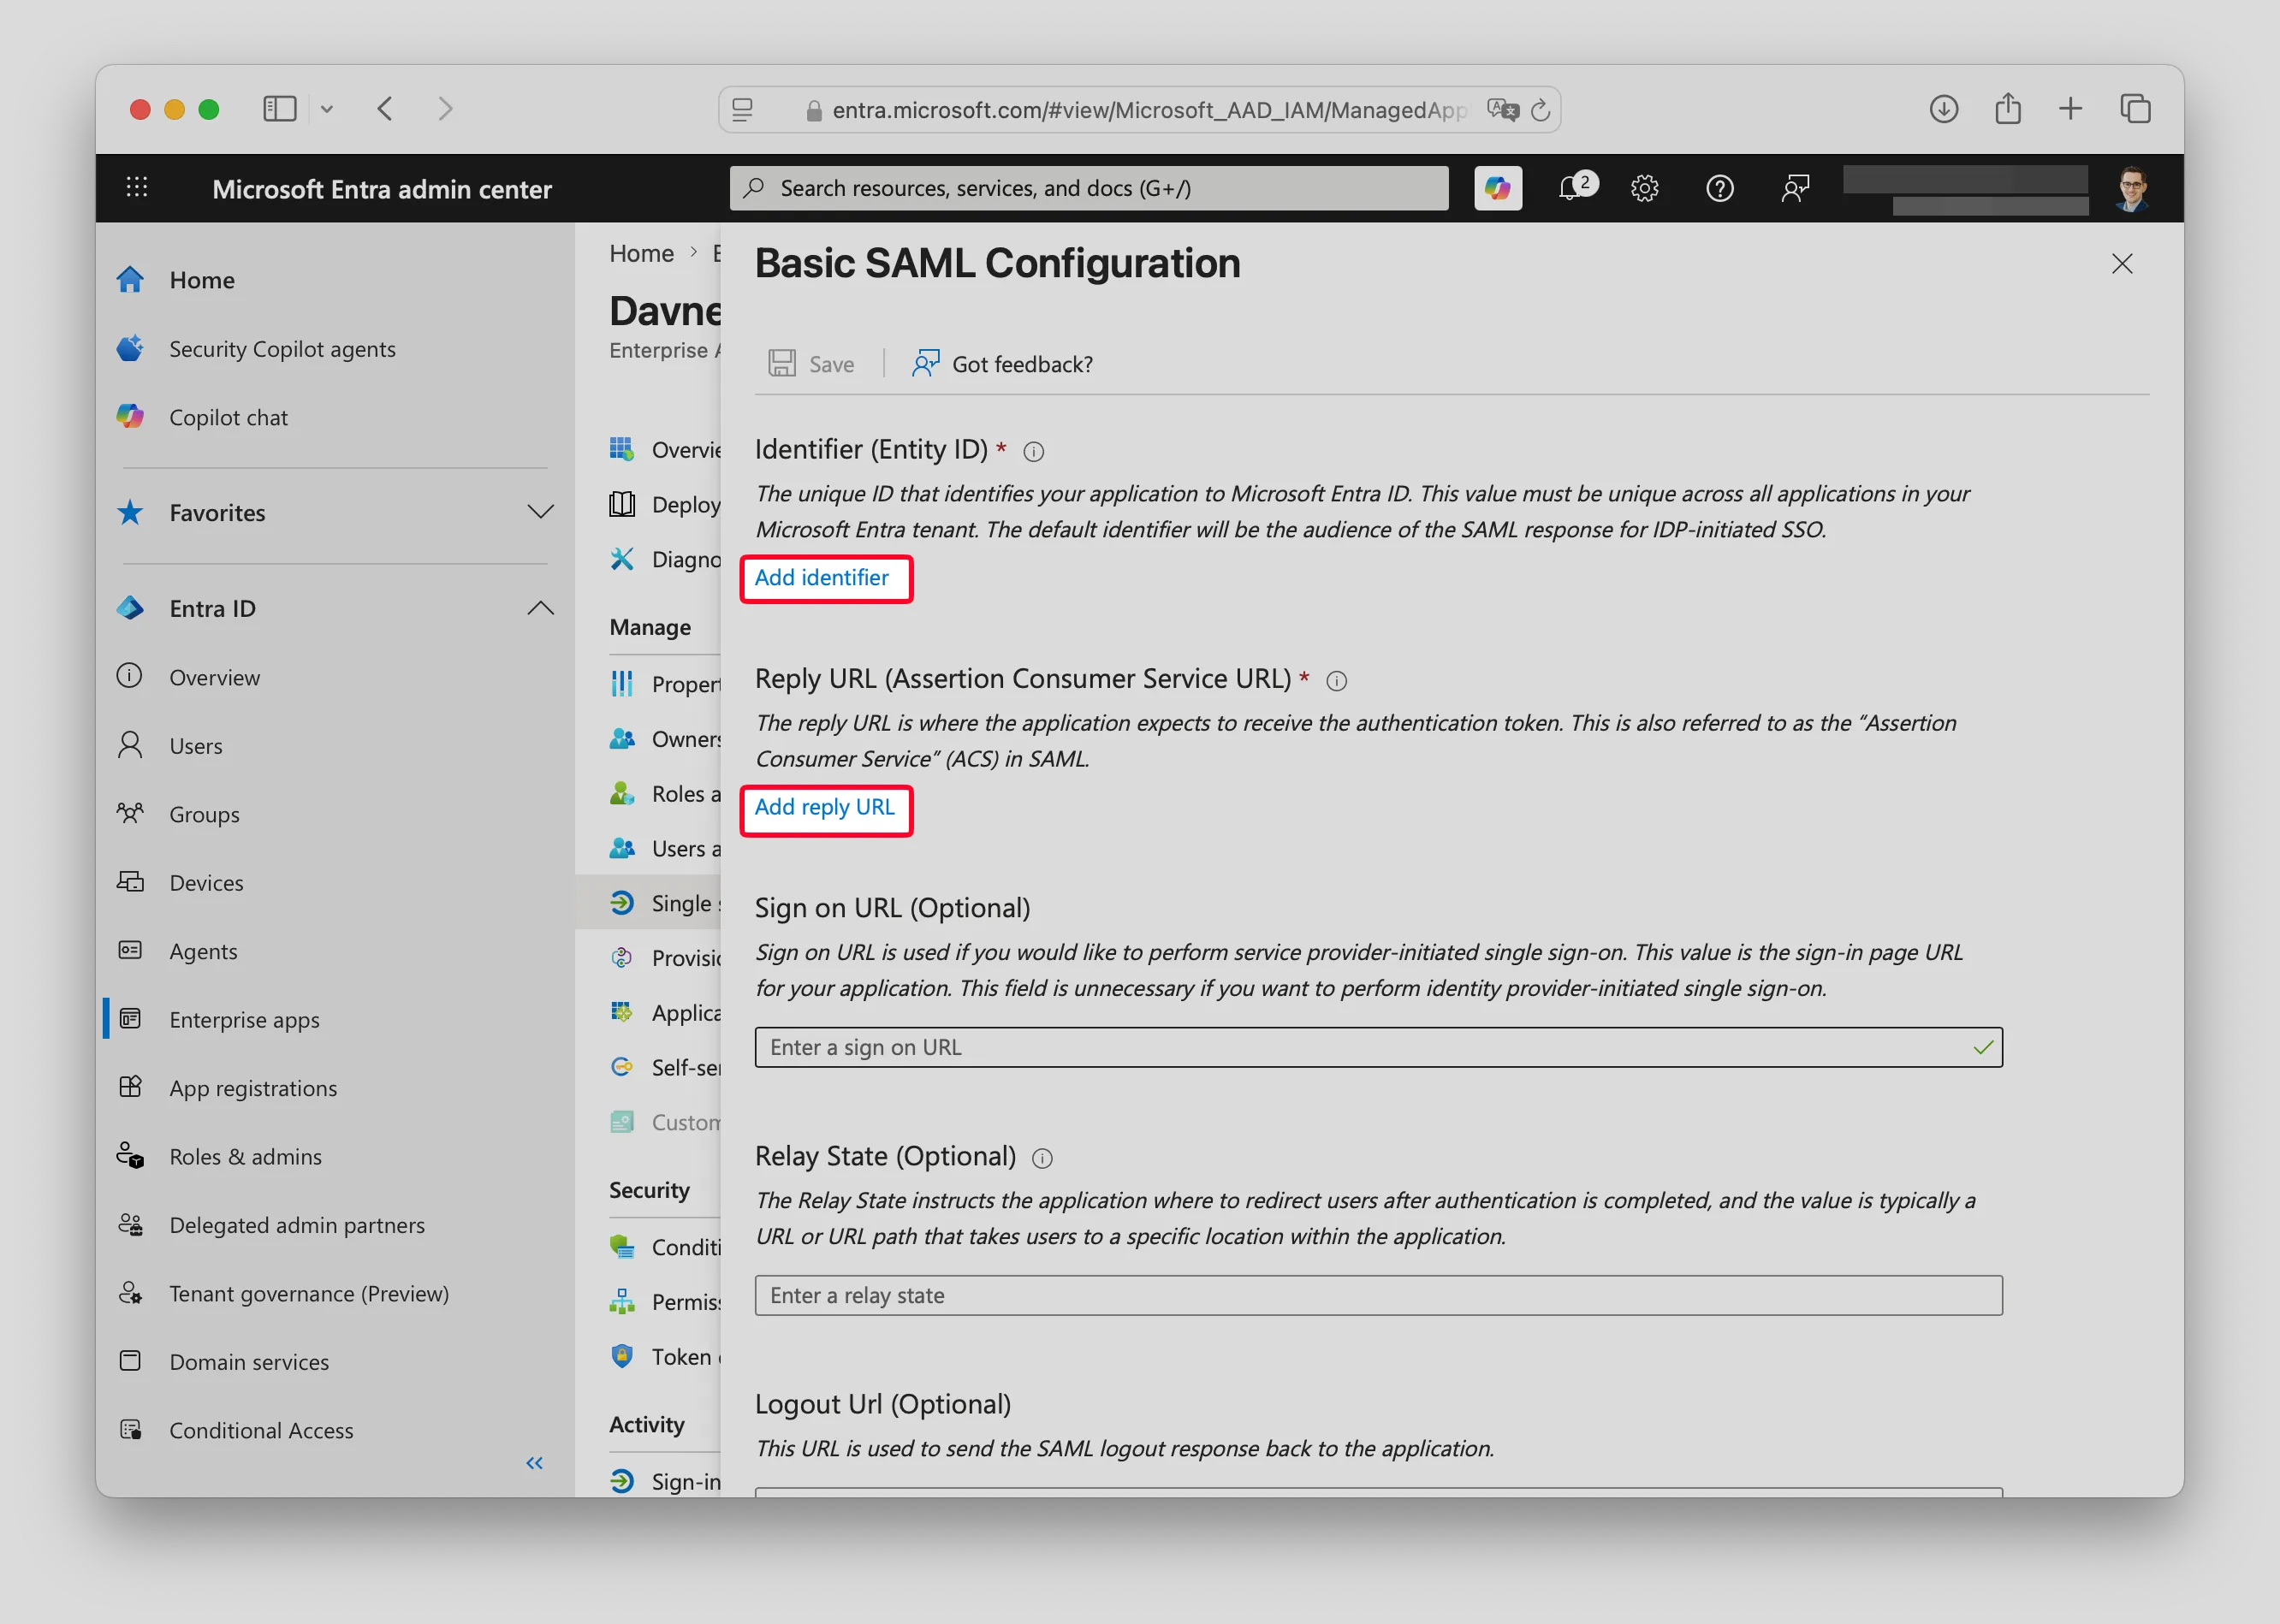
Copy Entra's metadata URL into Davner
In Entra’s SAML Certificates section, copy the App Federation Metadata Url.
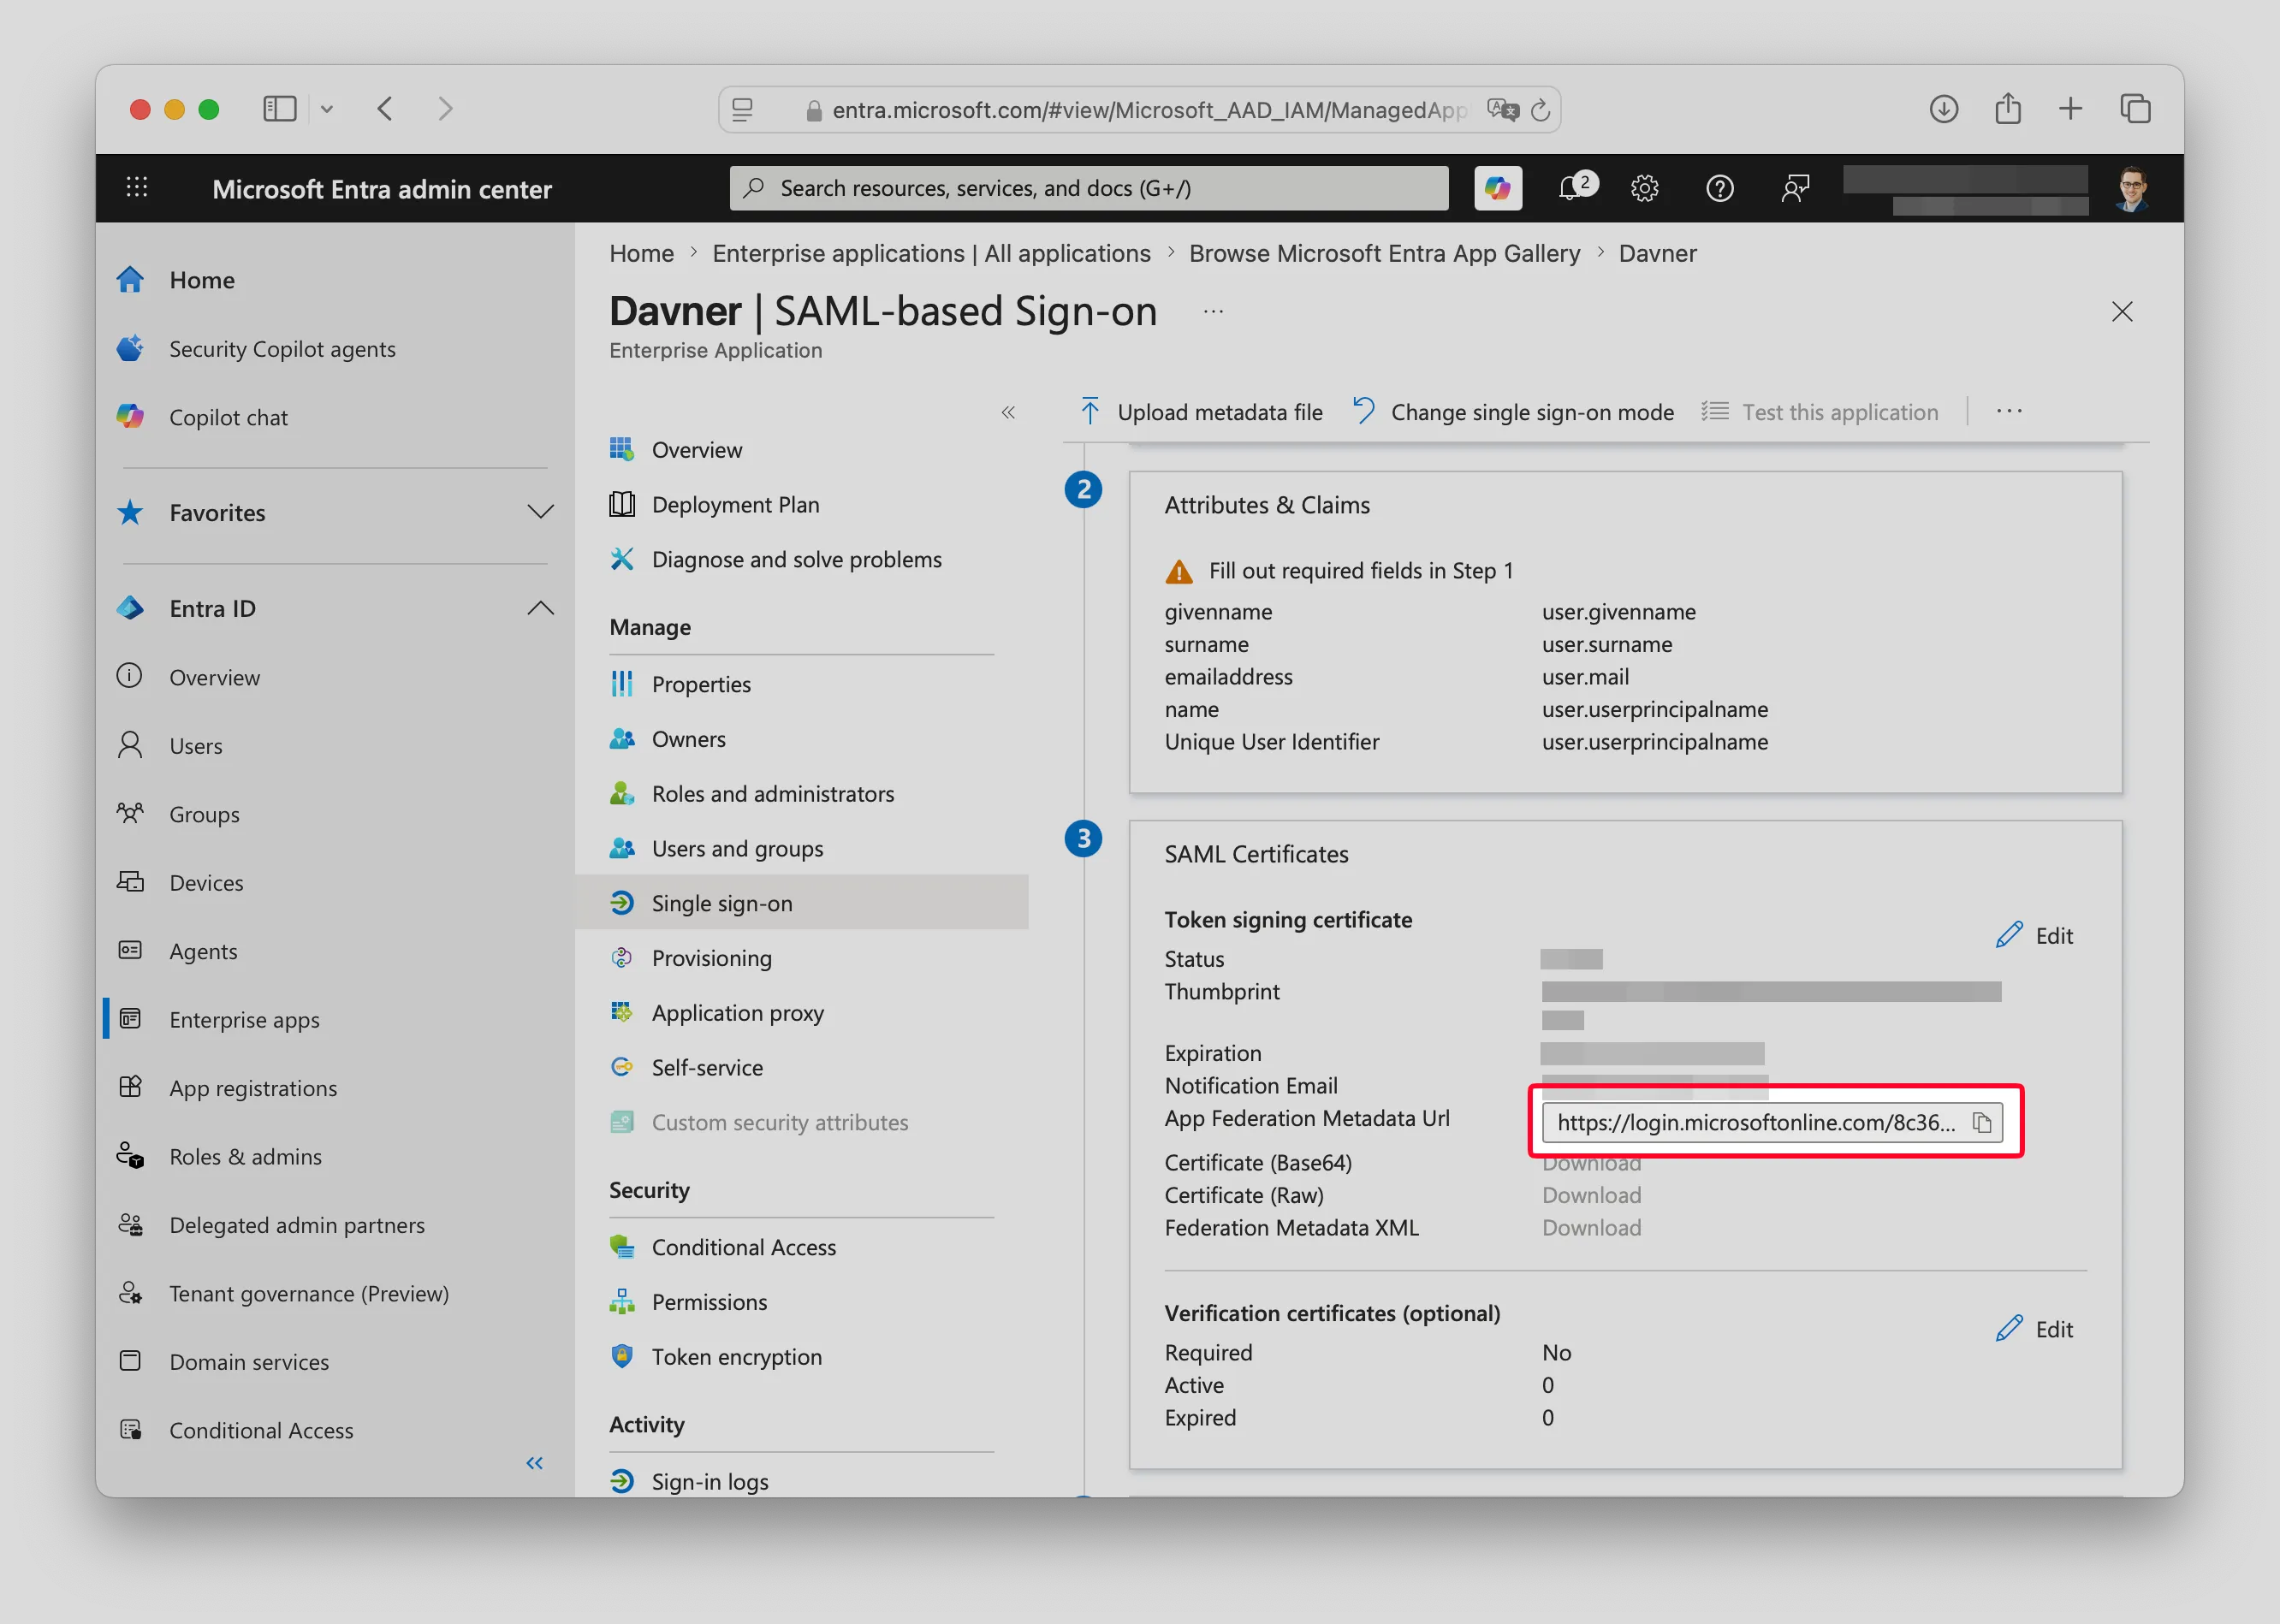
Return to Davner’s SSO settings. Under Metadata URL, paste it into App Federation Metadata URL.
Save the connection and verify your domain
Confirm the Domain field contains the email domain or domains your team uses. Separate multiple domains with commas if they share this Entra tenant.
Select Save and request activation. You’ll see Pending activation. Contact us so we can verify ownership of the domains. We’ll let you know when the connection is active, usually within a business day.
Test with a team member
Once Davner shows SSO is active, have a regular team member sign in at davner.com/login using an email address at a verified domain.
If Assignment required? is Yes, check that an assigned team member can sign in and an unassigned team member cannot. Use regular accounts for this check, since Entra Global Administrators can sign in regardless of assignment.
Davner creates their account when they first sign in and adds them to your organization as a Member.
Connect another Entra tenant
If your organization uses more than one Entra tenant, select Add another connection in Davner and repeat these steps for that tenant. Each connection has its own domains and Reply URL, so copy the values shown for the connection you’re setting up.