Members and roles
Set up your organization, invite your team, and manage who has access.
Your organization brings your practice’s requests, providers, members, and billing together in one place. We recommend keeping your locations in one organization so everyone can work together.
If your practice already uses Davner, ask an administrator for an invitation or sign in through your practice’s SSO.
Set up your organization
If you’re the first person at your practice to use Davner:
Create your account
Select Sign up on the sign-in page and enter your name and work email address. We’ll email you a code to finish creating your account. It expires in 10 minutes.
Create the organization
Enter your practice’s Organization name. Davner suggests a Slug, a unique identifier for your organization that other practices can use to share requests with you. Select Create organization.
If Davner says the organization already exists, your practice may already have an organization. Check with your administrator or contact us for help.
You become the organization’s Owner.
Invite your team
Enter your colleagues’ work email addresses and choose a role for each, then select Send invites. You can also select Skip for now and invite people later.
Sign in
Enter your work email address on the sign-in page and select Continue.
- If your organization uses single sign-on, Davner sends you to your identity provider to sign in.
- Otherwise, we email you a one-time sign-in code. Enter it to finish signing in. There’s no password to remember.
Organization settings
Open Organization to view your organization’s Overview, Members, Integrations, and Settings.
In Overview, you can see your organization’s name and ID. Admins and owners can edit the name and select Save changes.
In Integrations, select Browse Integrations to find the systems Davner works with. To connect a system, select Connect and follow the prompt to contact the Davner team.
In Settings, select Set up SSO to configure single sign-on.
Members and roles
Invite everyone who needs to use Davner, including staff who handle prior authorizations, providers, and IT and support staff. Each person should have their own account.
Most people should be Members. Keep admin access to the small group responsible for managing Davner at your practice, such as IT leaders, prior authorization leaders, and management.
| Role | Who should use it | Access |
|---|---|---|
| Member | Staff and providers who use Davner in their day-to-day work. | Work on requests and providers. |
| Admin | The small group responsible for managing the organization. | Manage members, invitations, billing, and SSO, in addition to day-to-day work. |
| Owner | The person responsible for the organization’s Davner account. | Admin access, plus the ability to transfer ownership. |
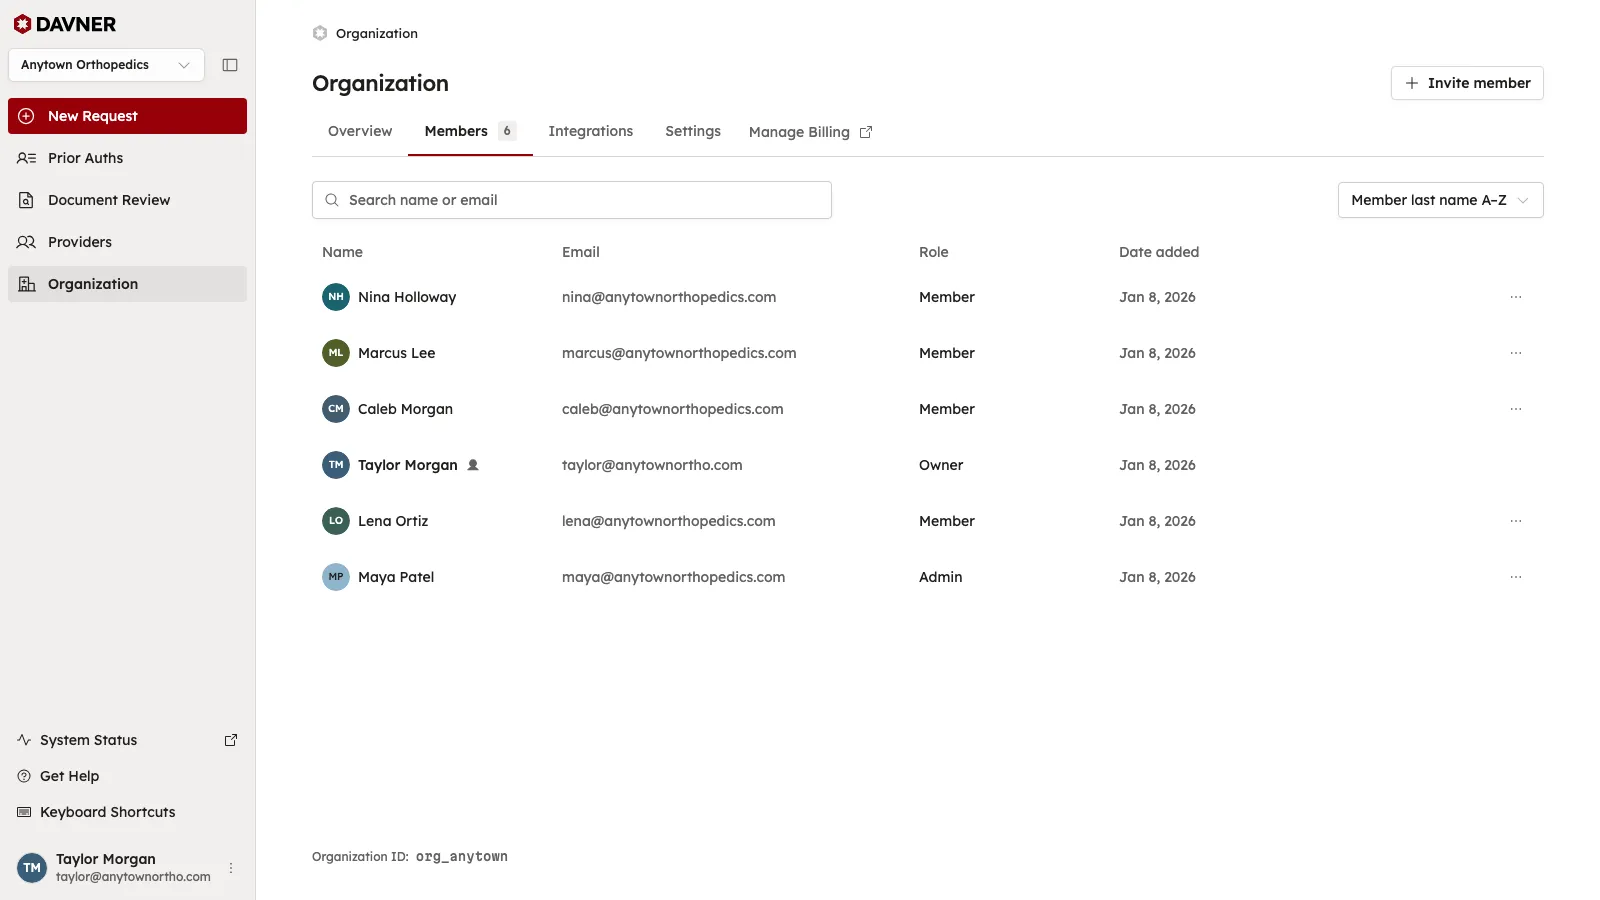
Manage your team’s access in the Members tab of Organization. Search by name or email, or use the sort menu to find a person.
Add your team
Invite someone by email
Send the invitation
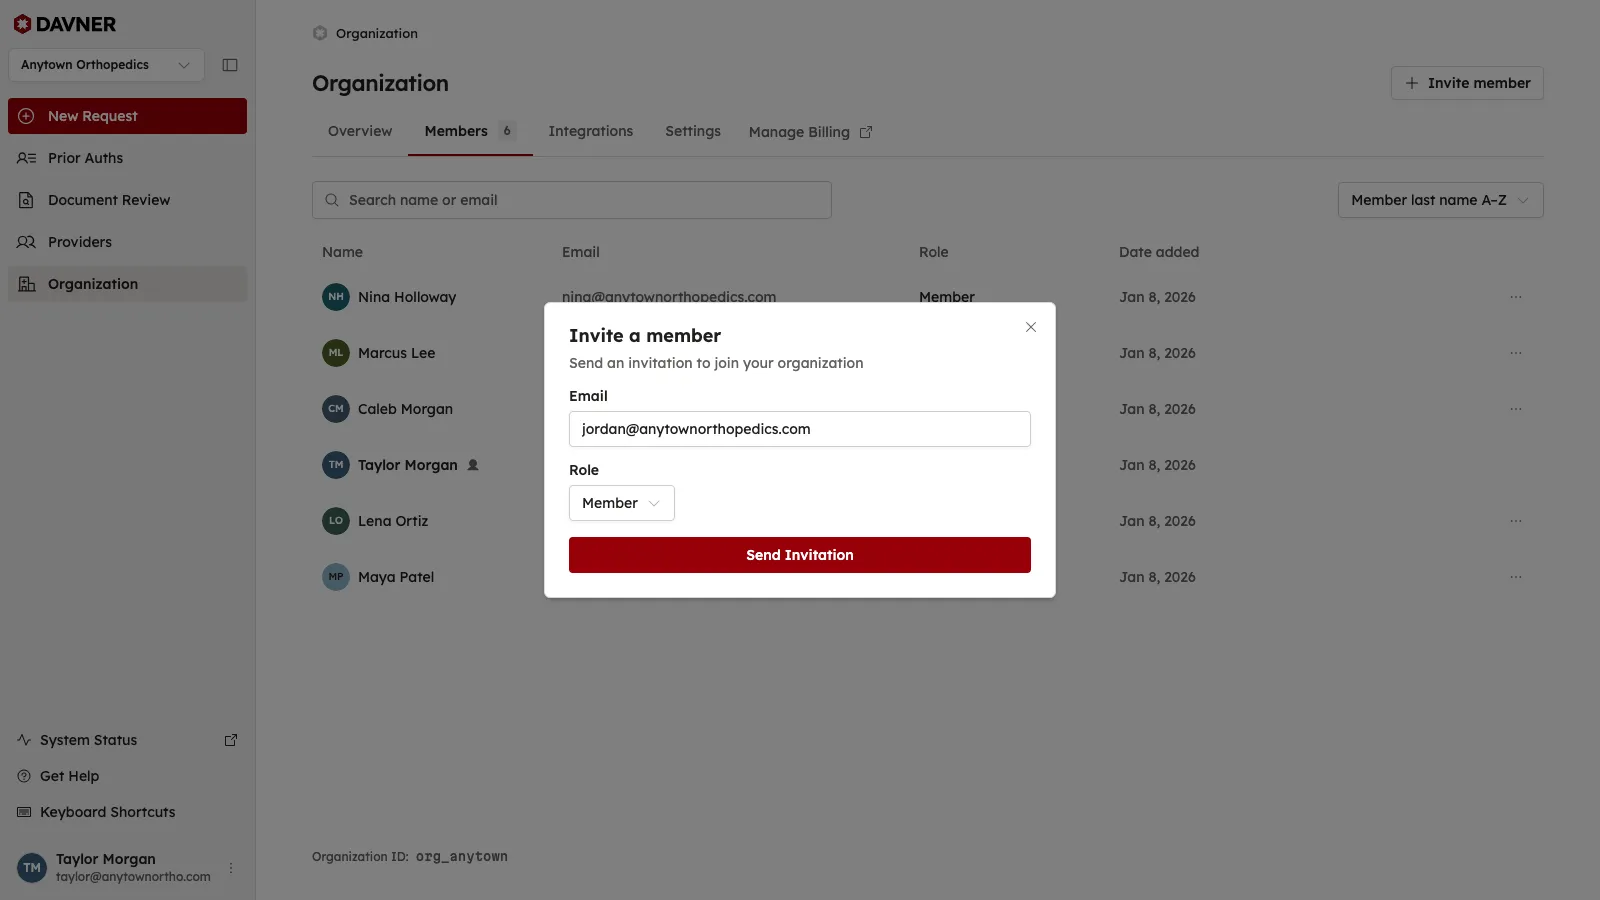
As an admin or owner, open Organization → Members and select Invite member. Enter the person’s work email address, choose Member or Admin, and select Send Invitation.
Have them accept
The person receives an email with an invitation link. They sign in or create an account using that email address, then select Accept invitation.
Their invitation appears as Pending in the members table until they accept it.
Through SSO
If your organization uses single sign-on, grant access through your identity provider. Davner creates each person’s account when they first sign in and adds them to the organization as a Member.
They don’t need a separate email invitation. If someone needs admin access, change their role in Davner after they join.
Manage members
Change a role
As an admin or owner, find the person in Organization → Members, open their … menu, and select Change to admin or Change to member.
Remove a member
As an admin or owner, open Organization → Members, open the … menu beside the person, and select Remove from organization, then confirm Remove. This removes their access to the organization’s data.
If your organization uses SSO, have IT revoke their access through your identity provider too.
Other membership tasks
Replace or cancel an invitation
As an admin or owner, select the × beside a pending invitation in Organization → Members and confirm Revoke. You can then send a new invitation if the address was incorrect or the invitation expired.
The recipient should accept the invitation using the email address it was sent to.
Transfer ownership
As the owner, open Organization → Members, open the … menu beside an existing member, and select Transfer ownership. Check their name and select Transfer. They become an owner, and you stay in the organization as an admin.
Leave an organization
In Organization → Members, select Leave organization below the table and confirm Leave. You’ll lose access to the organization and its data. If you’re the owner, transfer ownership before leaving; the leave action appears after you are no longer an owner.
Billing
We use Stripe, our secure payment partner, to handle billing according to the terms in your organization’s contract.
As an admin or owner, open Organization and select Manage Billing. This opens your organization’s billing page in Stripe, where you can view invoices and payment history.
For questions about an invoice or your billing setup, contact us.
Working across organizations
Separate organizations keep their data separate. Use them when one team shouldn’t have access to another team’s work. Individual prior authorization requests can still be shared between organizations.
If you belong to more than one organization, select the organization name near the top of the sidebar and choose the one you want to work in.
If you’d like help deciding how to organize your practice in Davner, contact us.